Requirements:
- Installation must be carried out by a crew or organization holding a certificate of professional competence.
- To avoid deformation of a screw-pile (strip, pile, etc.) foundation caused by frost heave, the following must be done: a blind area (apron) around the House in line with current SP (SNiP); a gutter system for organized drainage of water away from the foundation; a drainage system for the installed foundation.
- Constantly monitor the condition of the plinth part of the foundation that protrudes from the ground and of the perimeter apron around the foundation. If cracks, chips or similar damage appear on the foundation, contact our company's specialists immediately.
- Without a specially developed design agreed with our company, do not carry out work that could damage: the crushed stone and sand base of the foundation; the integrity of the foundation, including its plinth; the vertical and horizontal waterproofing of the foundation (if any); the ventilation of the technical crawl space or basement (if any); the cladding and insulation of the foundation (if any).
If the above requirements are not met, the strength of the foundation may be weakened, which may impair the load-bearing capacity of the House as a whole.
1. Screw-pile foundation
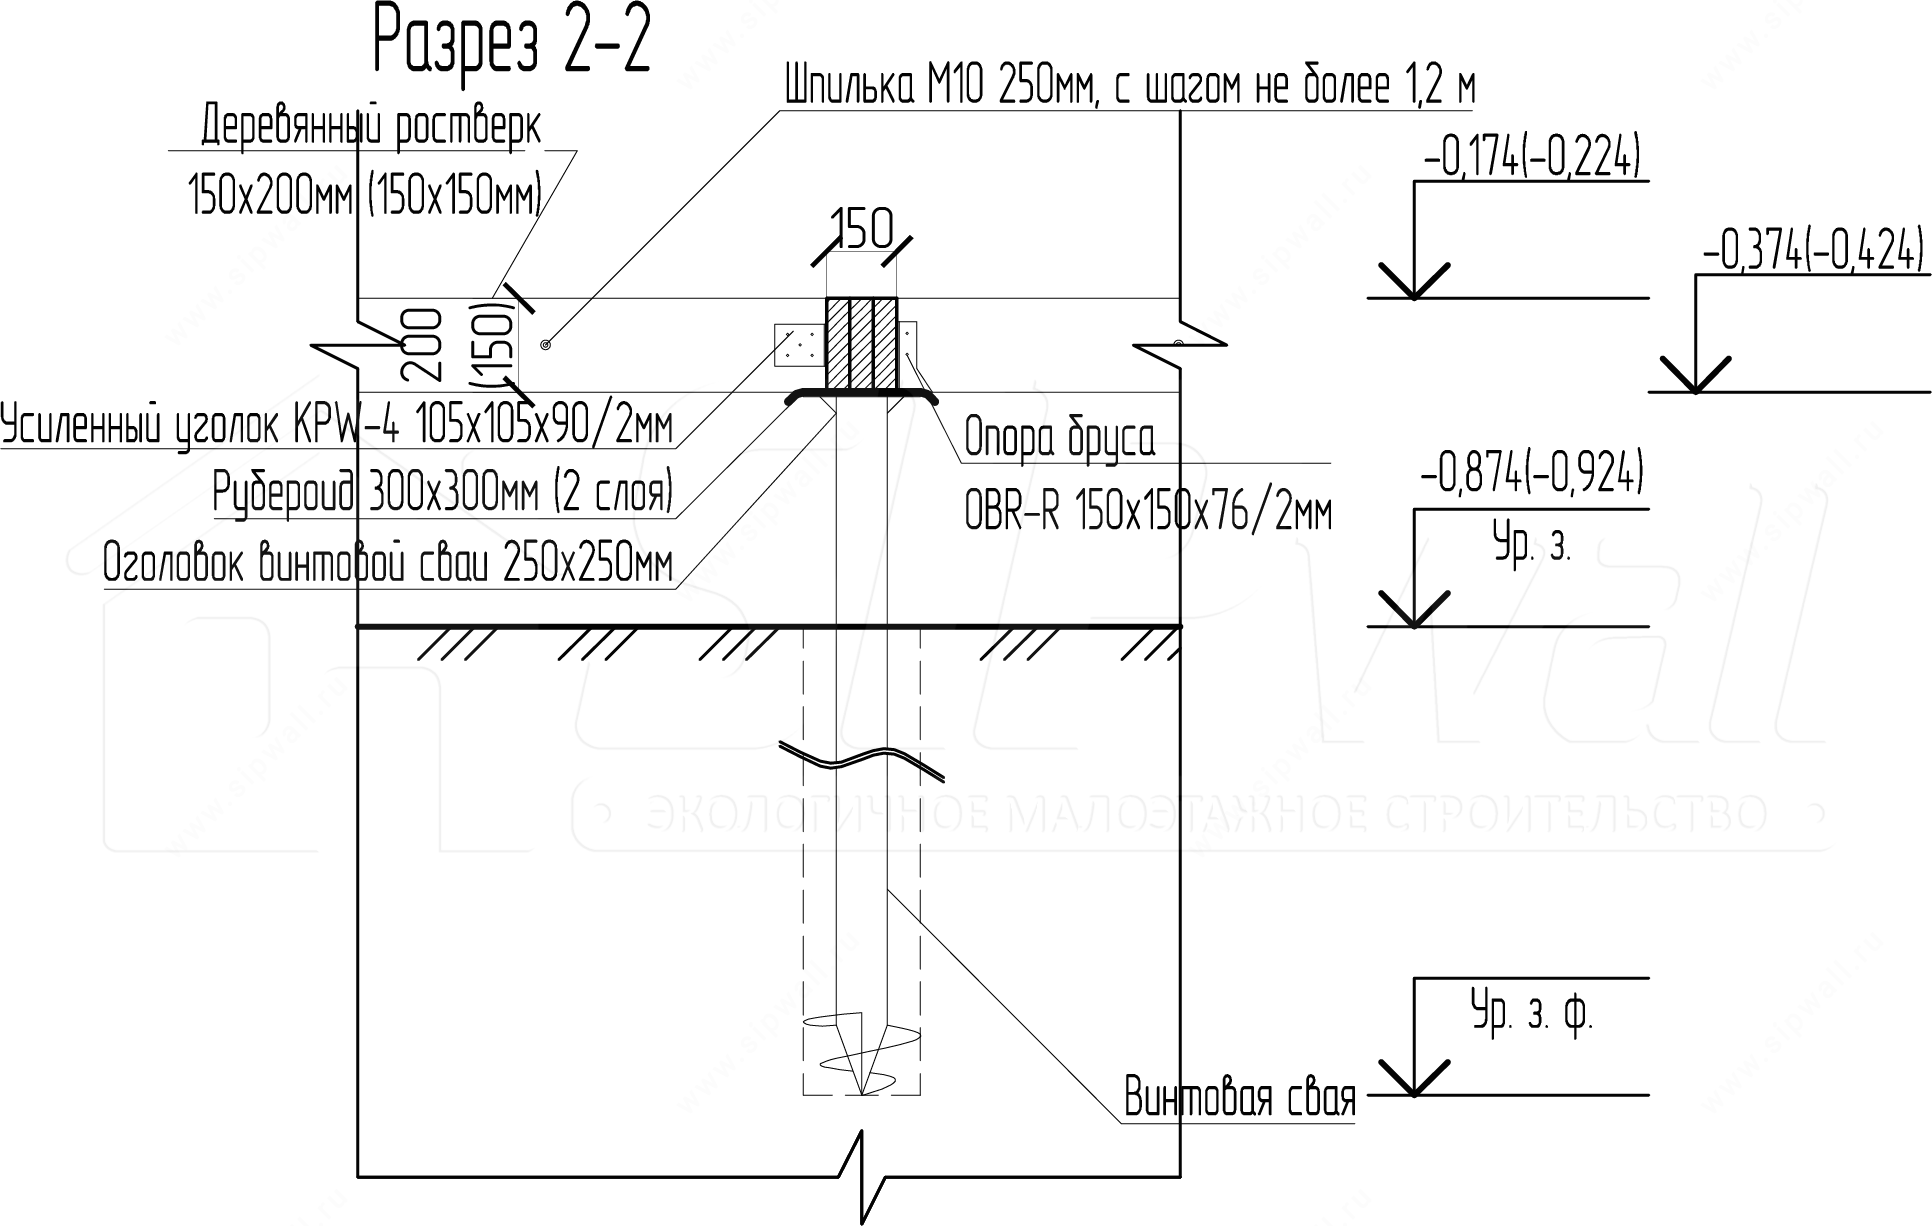
Main details of a grillage made of boards at natural moisture content 50 × 200 mm (50 × 150 mm) on screw piles
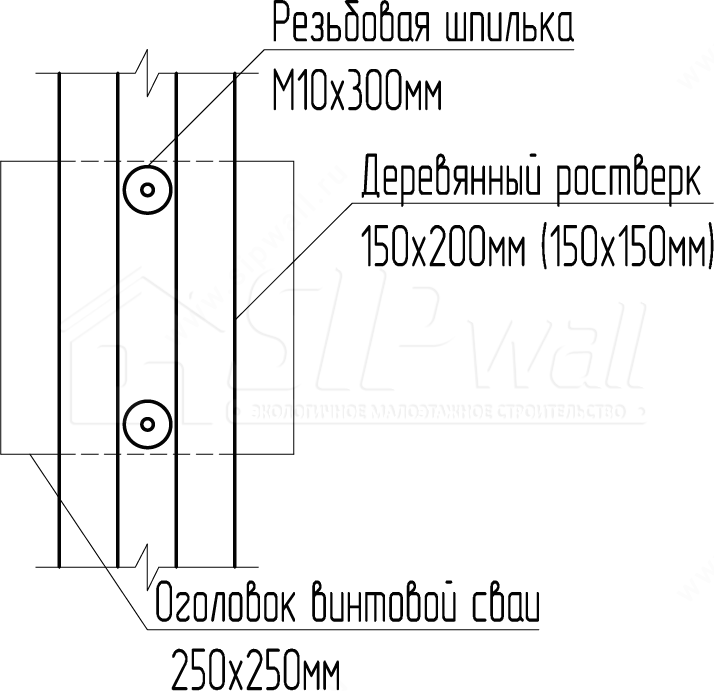
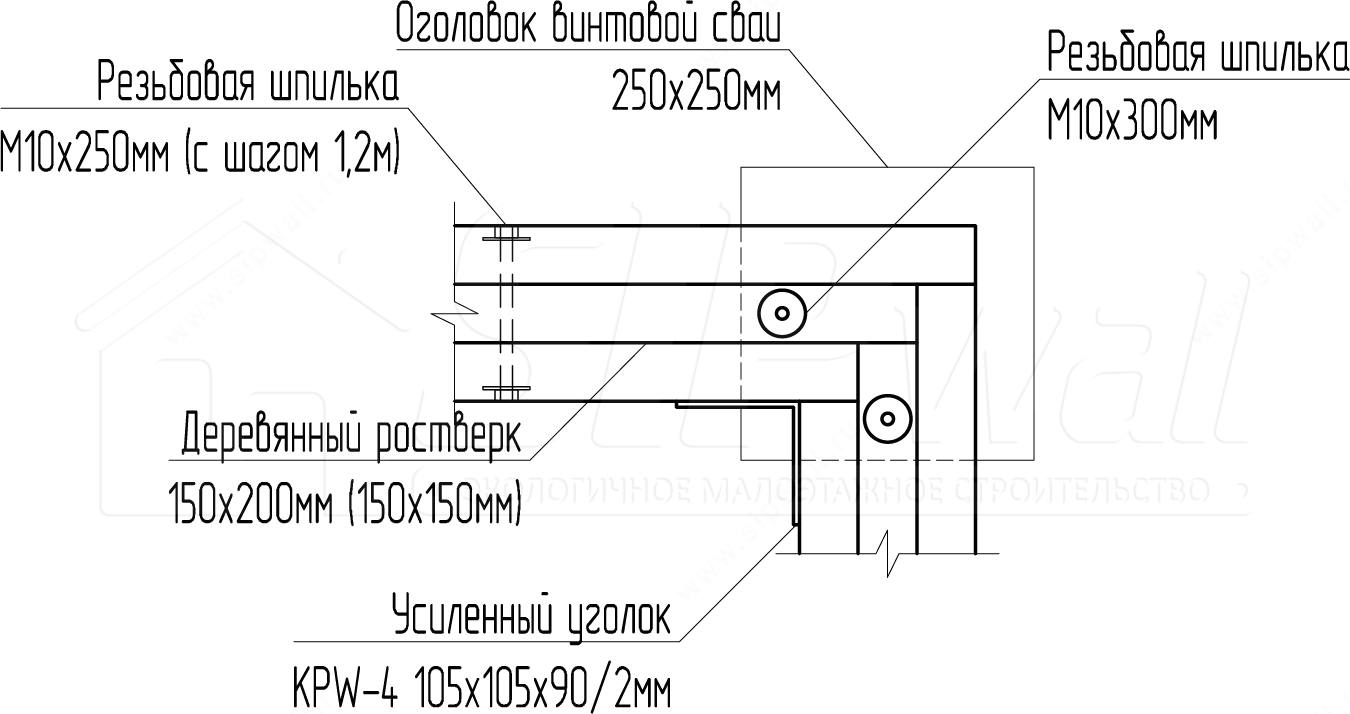
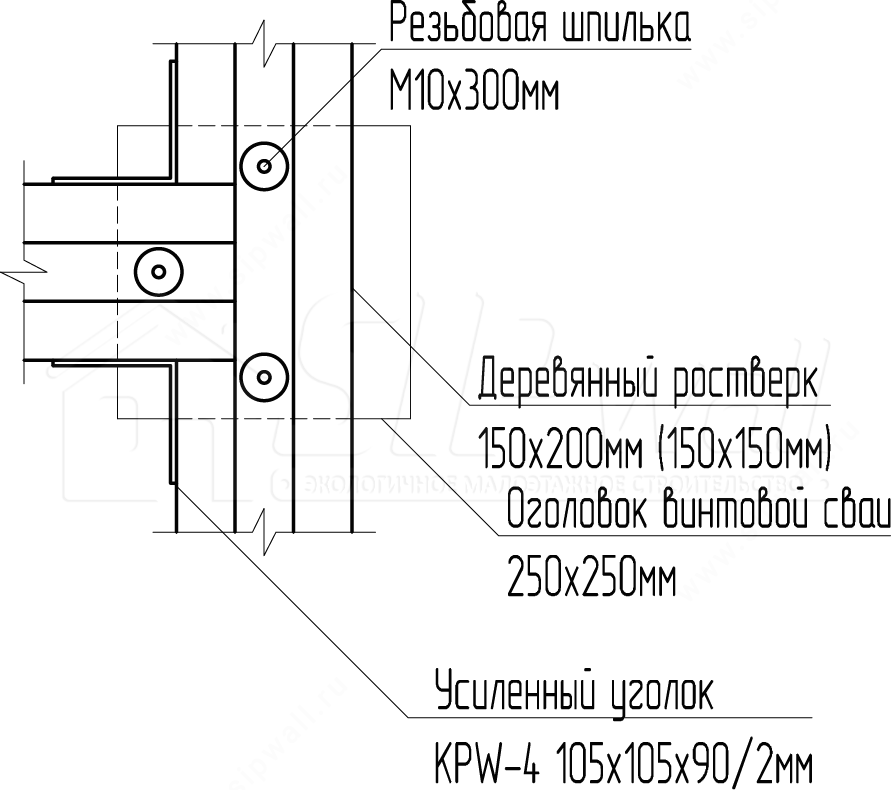
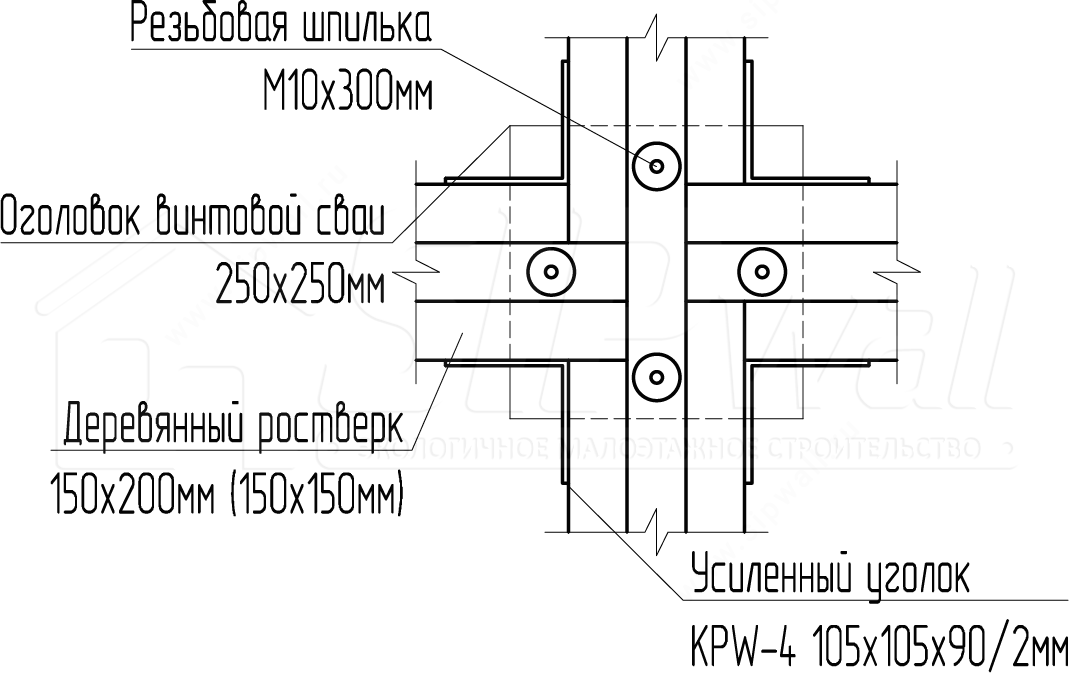
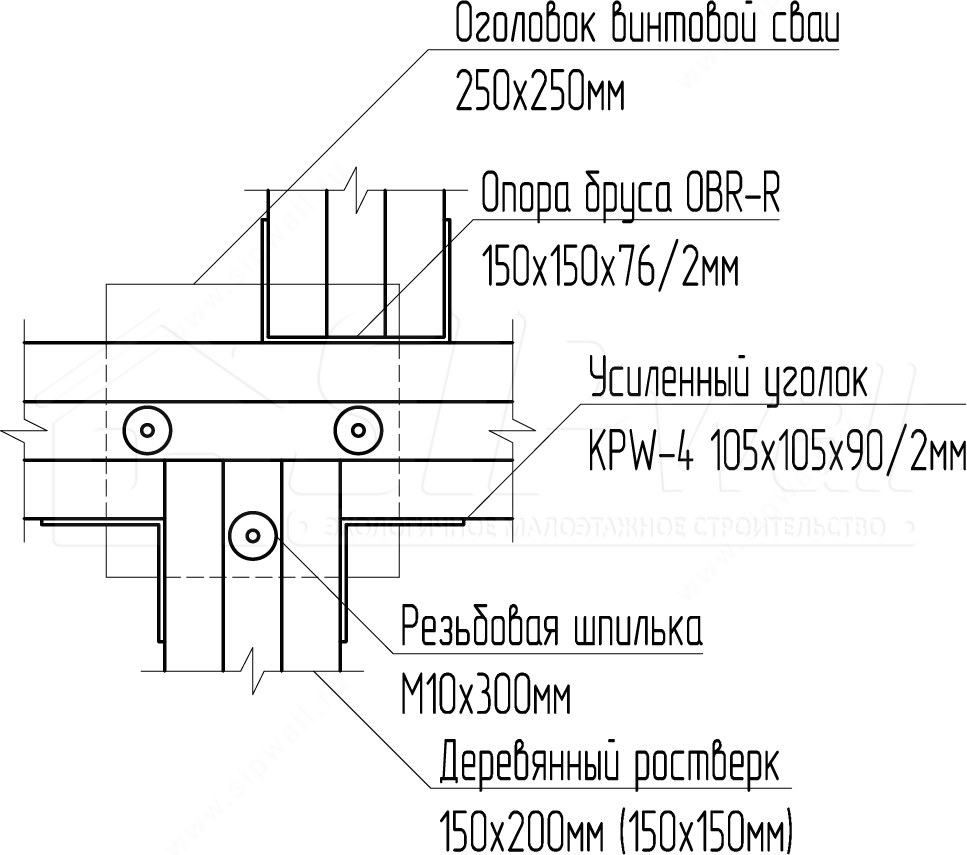
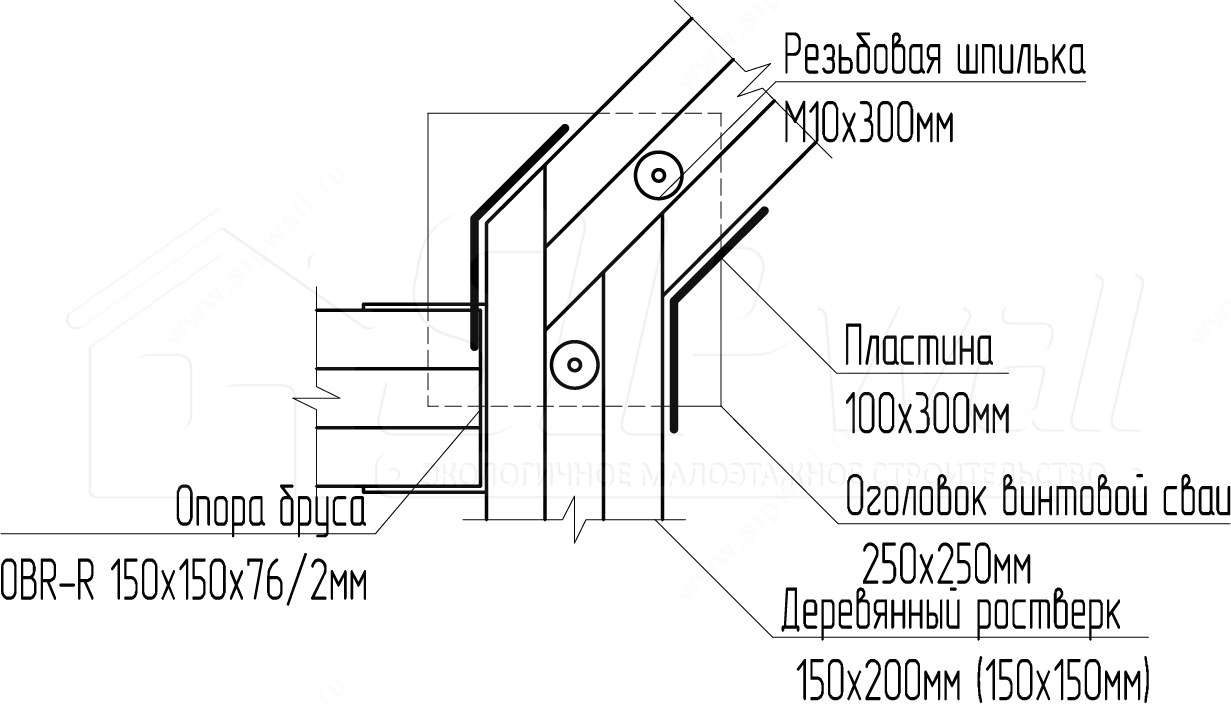
The foundation depth for a particular soil type is determined by the construction area and, without measures against frost heave, is set no higher than the standard seasonal frost penetration depth.
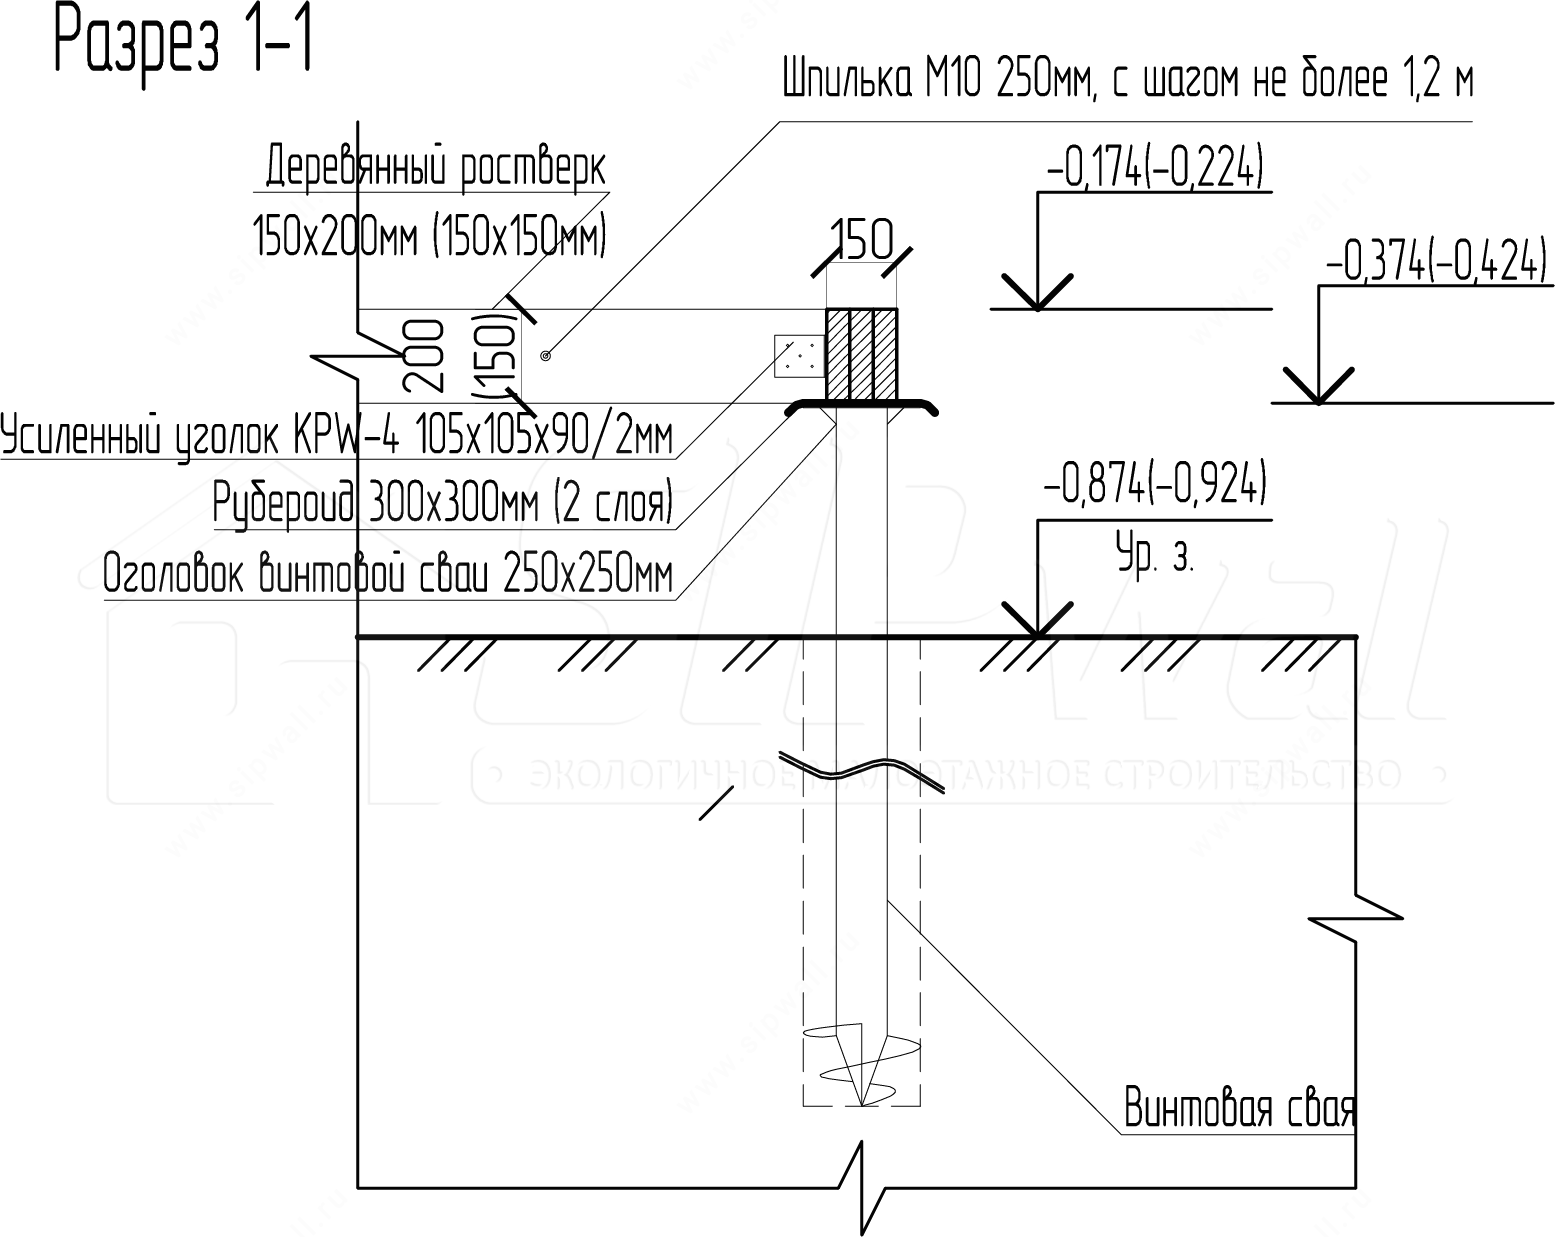
Main details of a grillage made of dry boards 37 × 200 mm (37 × 150 mm) on screw piles
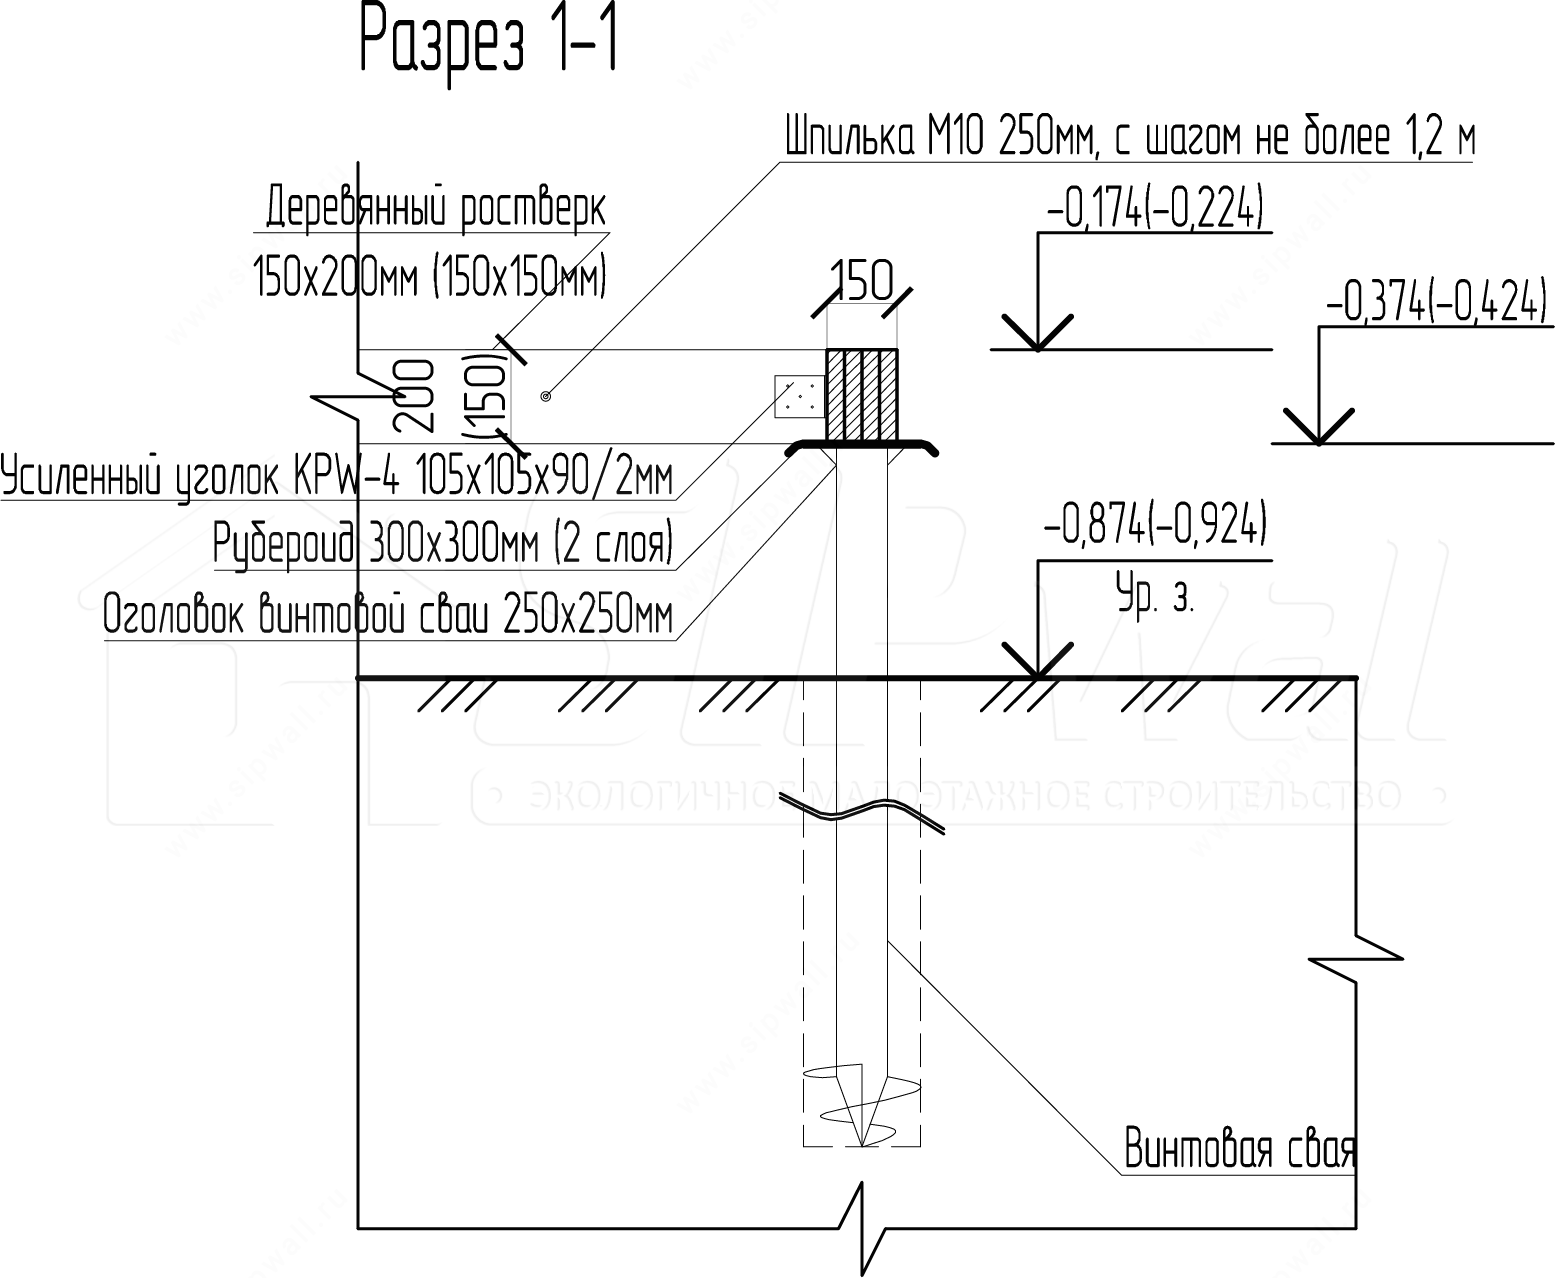
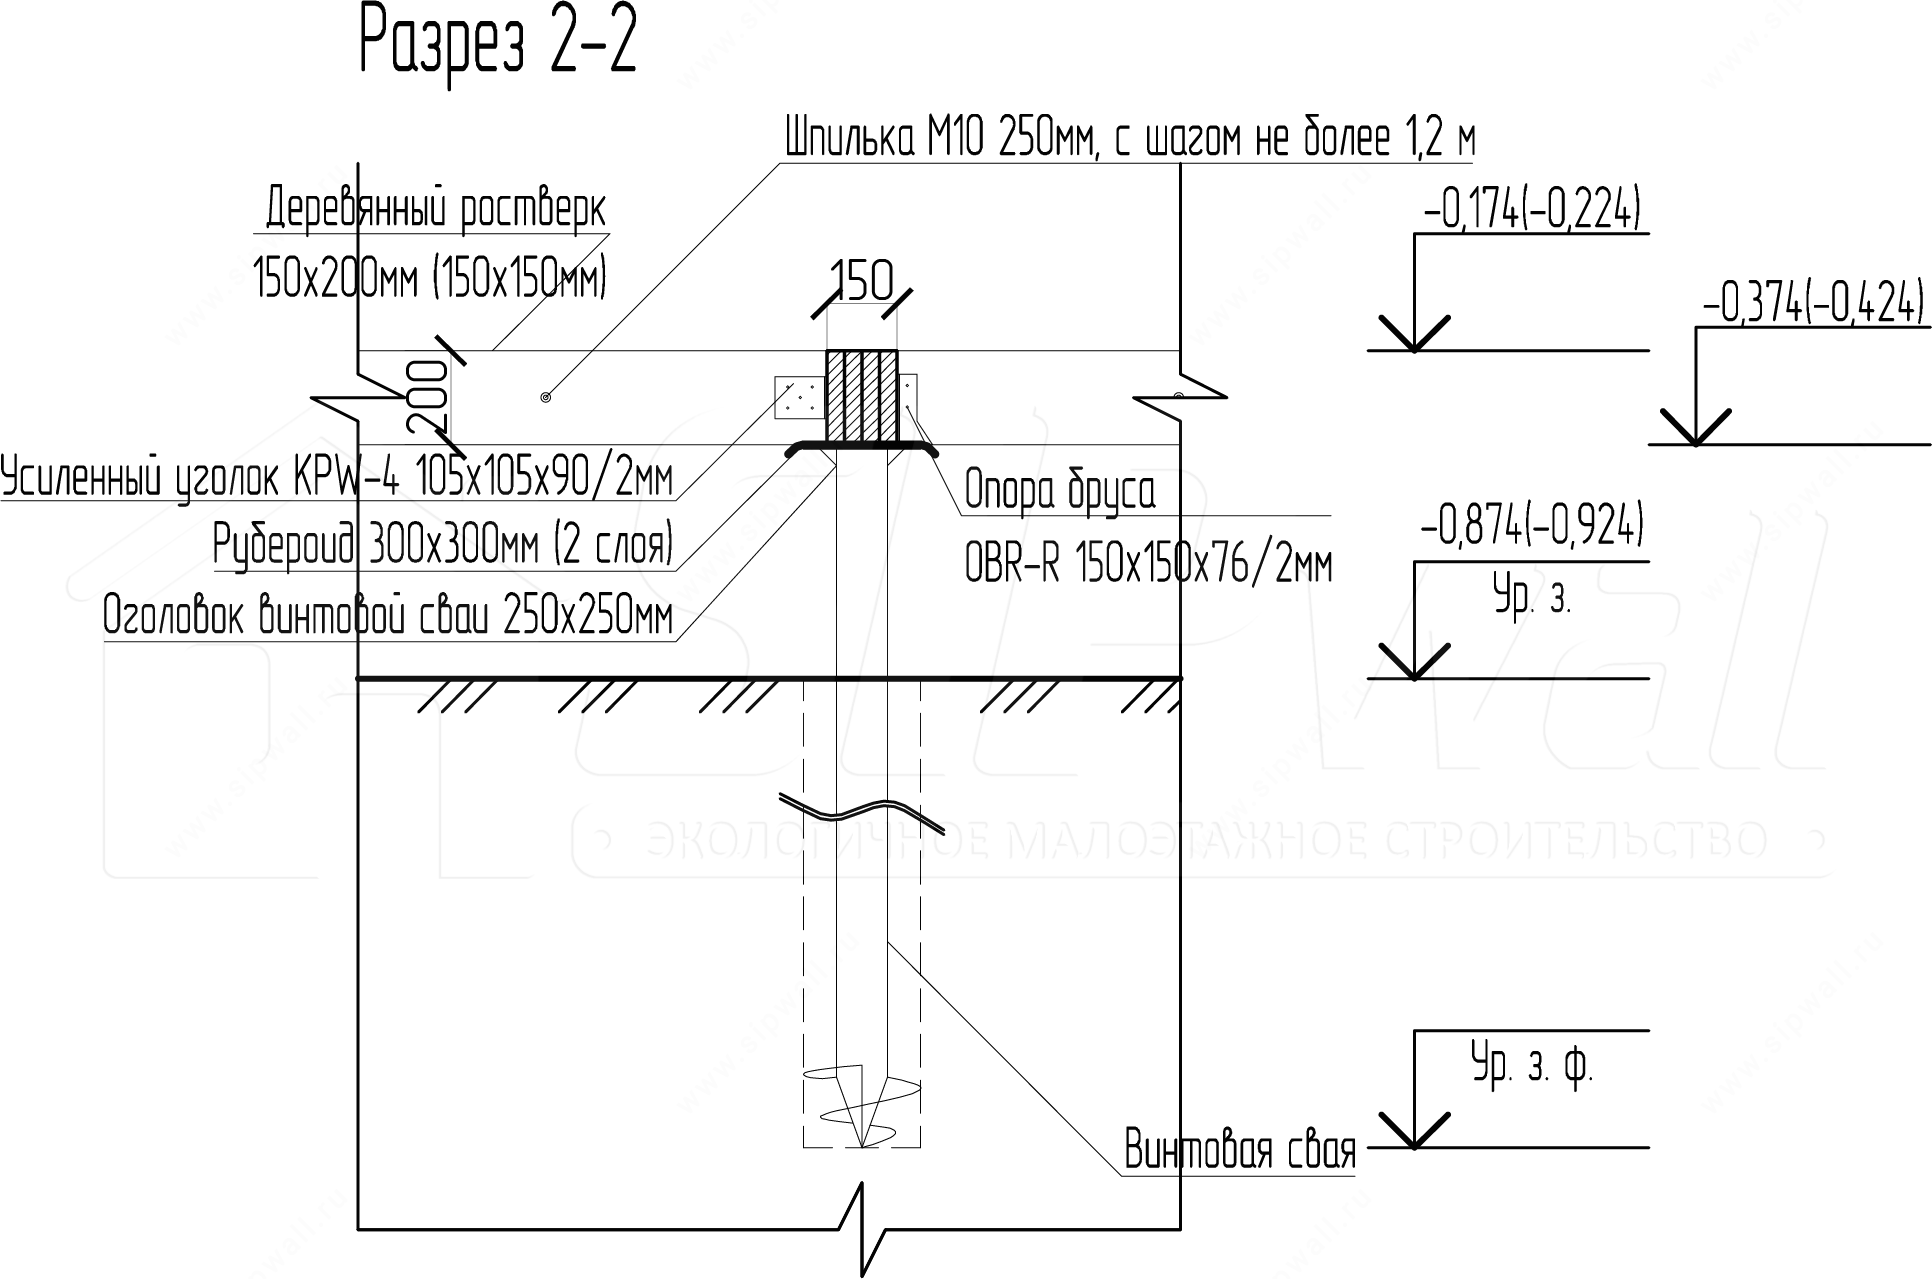
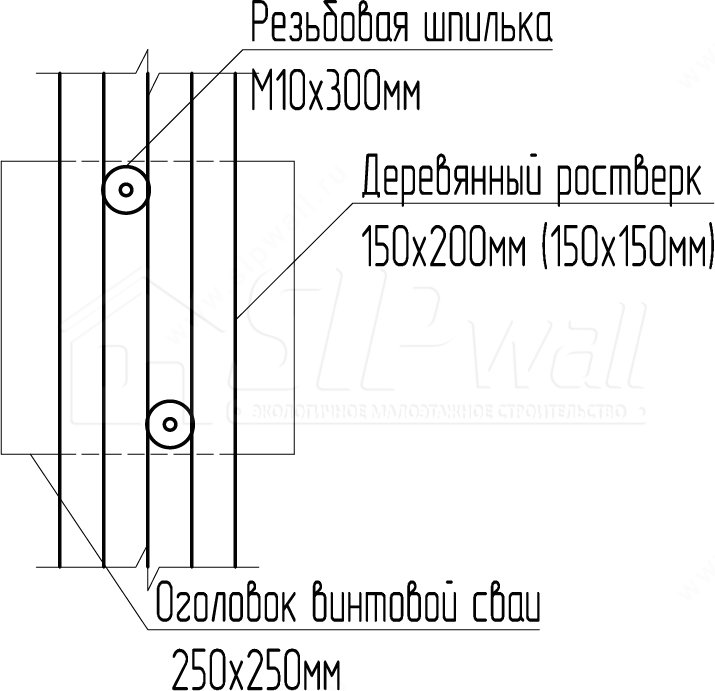
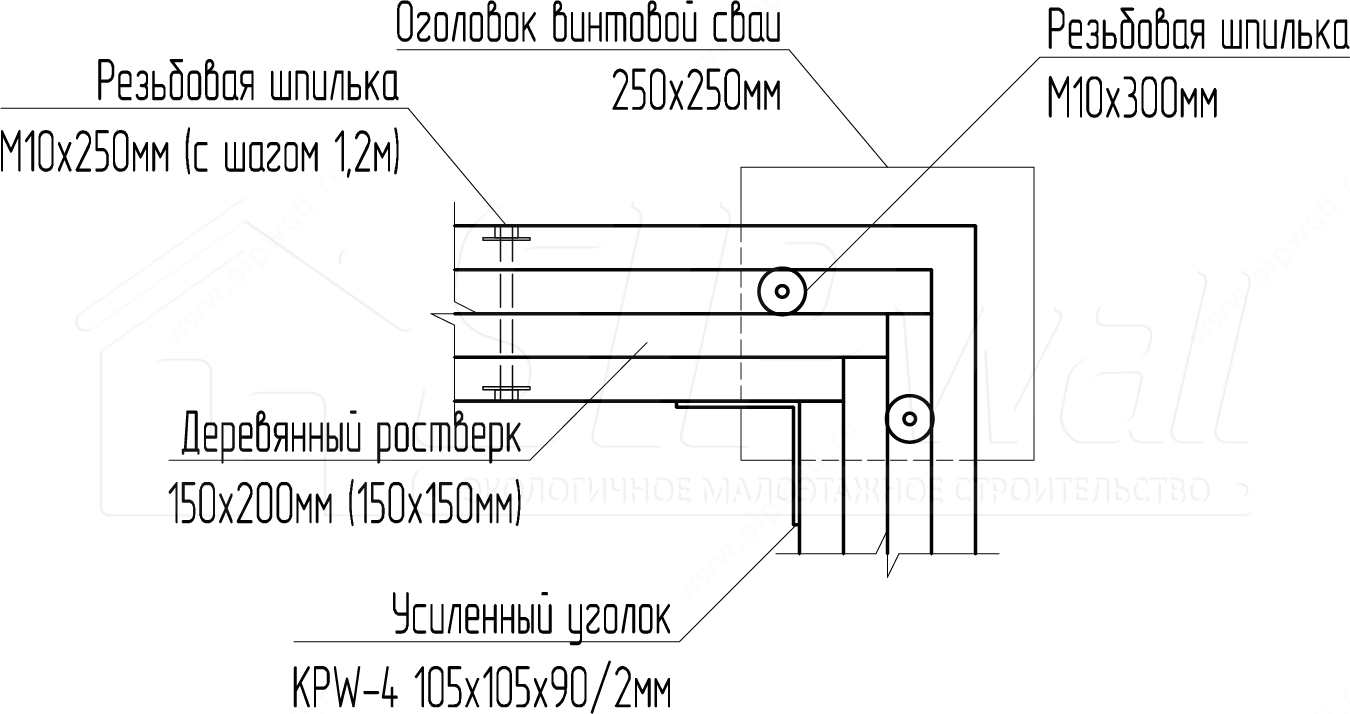
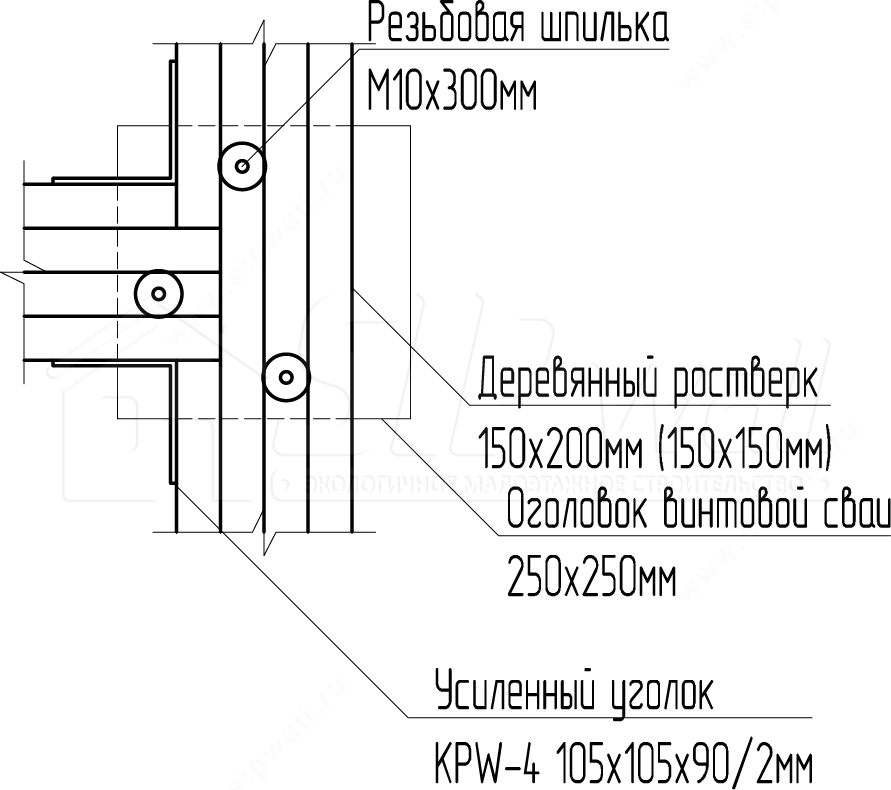
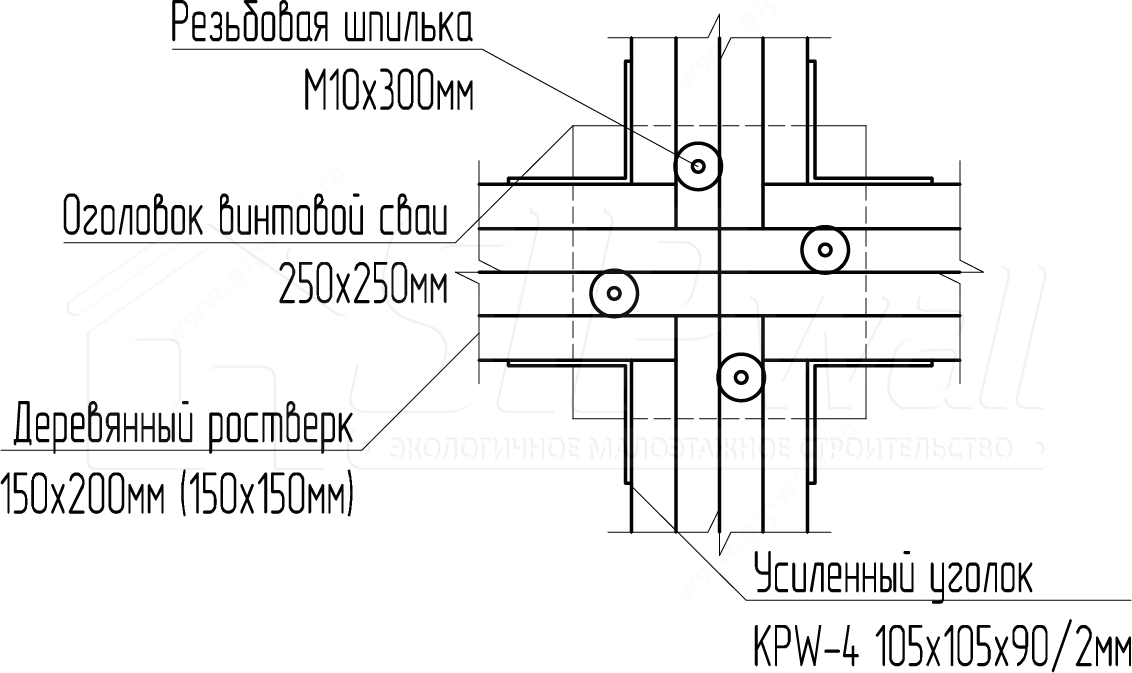
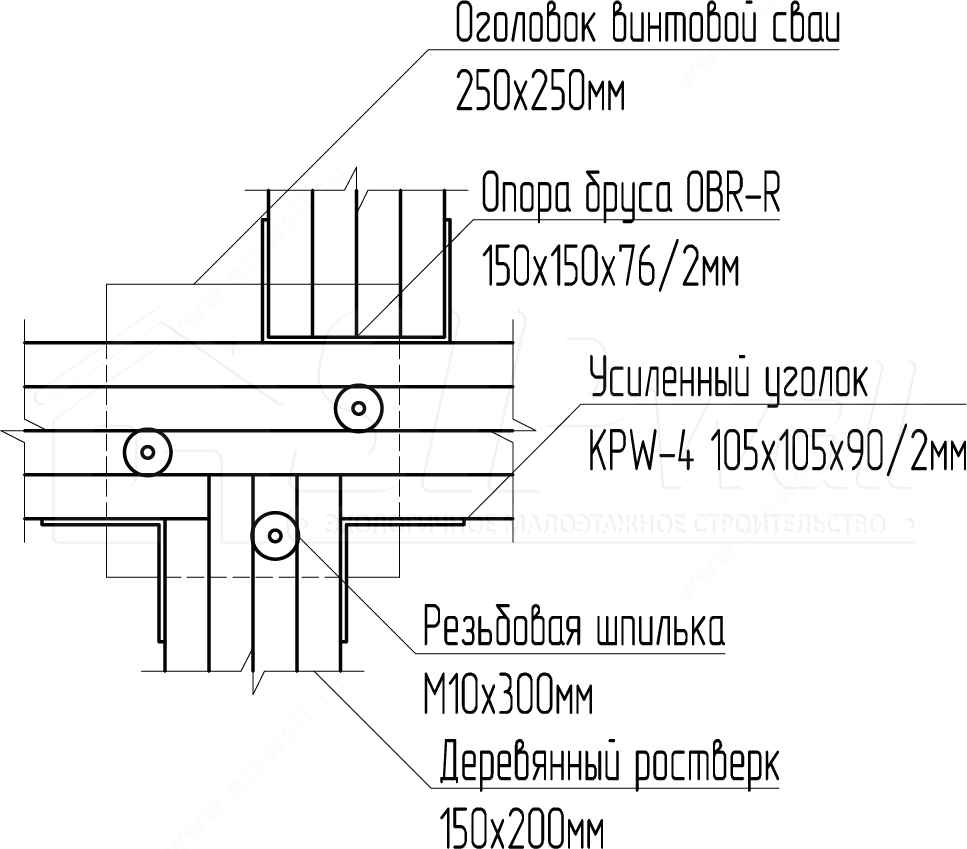
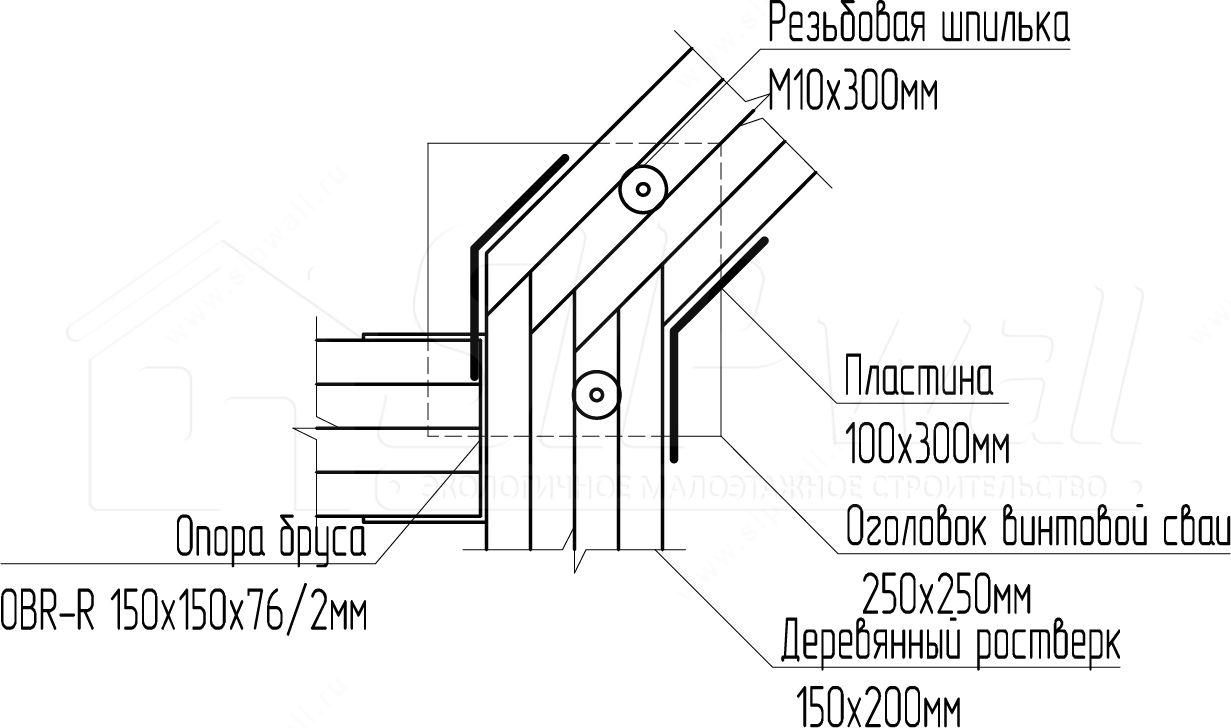
The foundation depth for a particular soil type is determined by the construction area and, without measures against frost heave, is set no higher than the standard seasonal frost penetration depth.
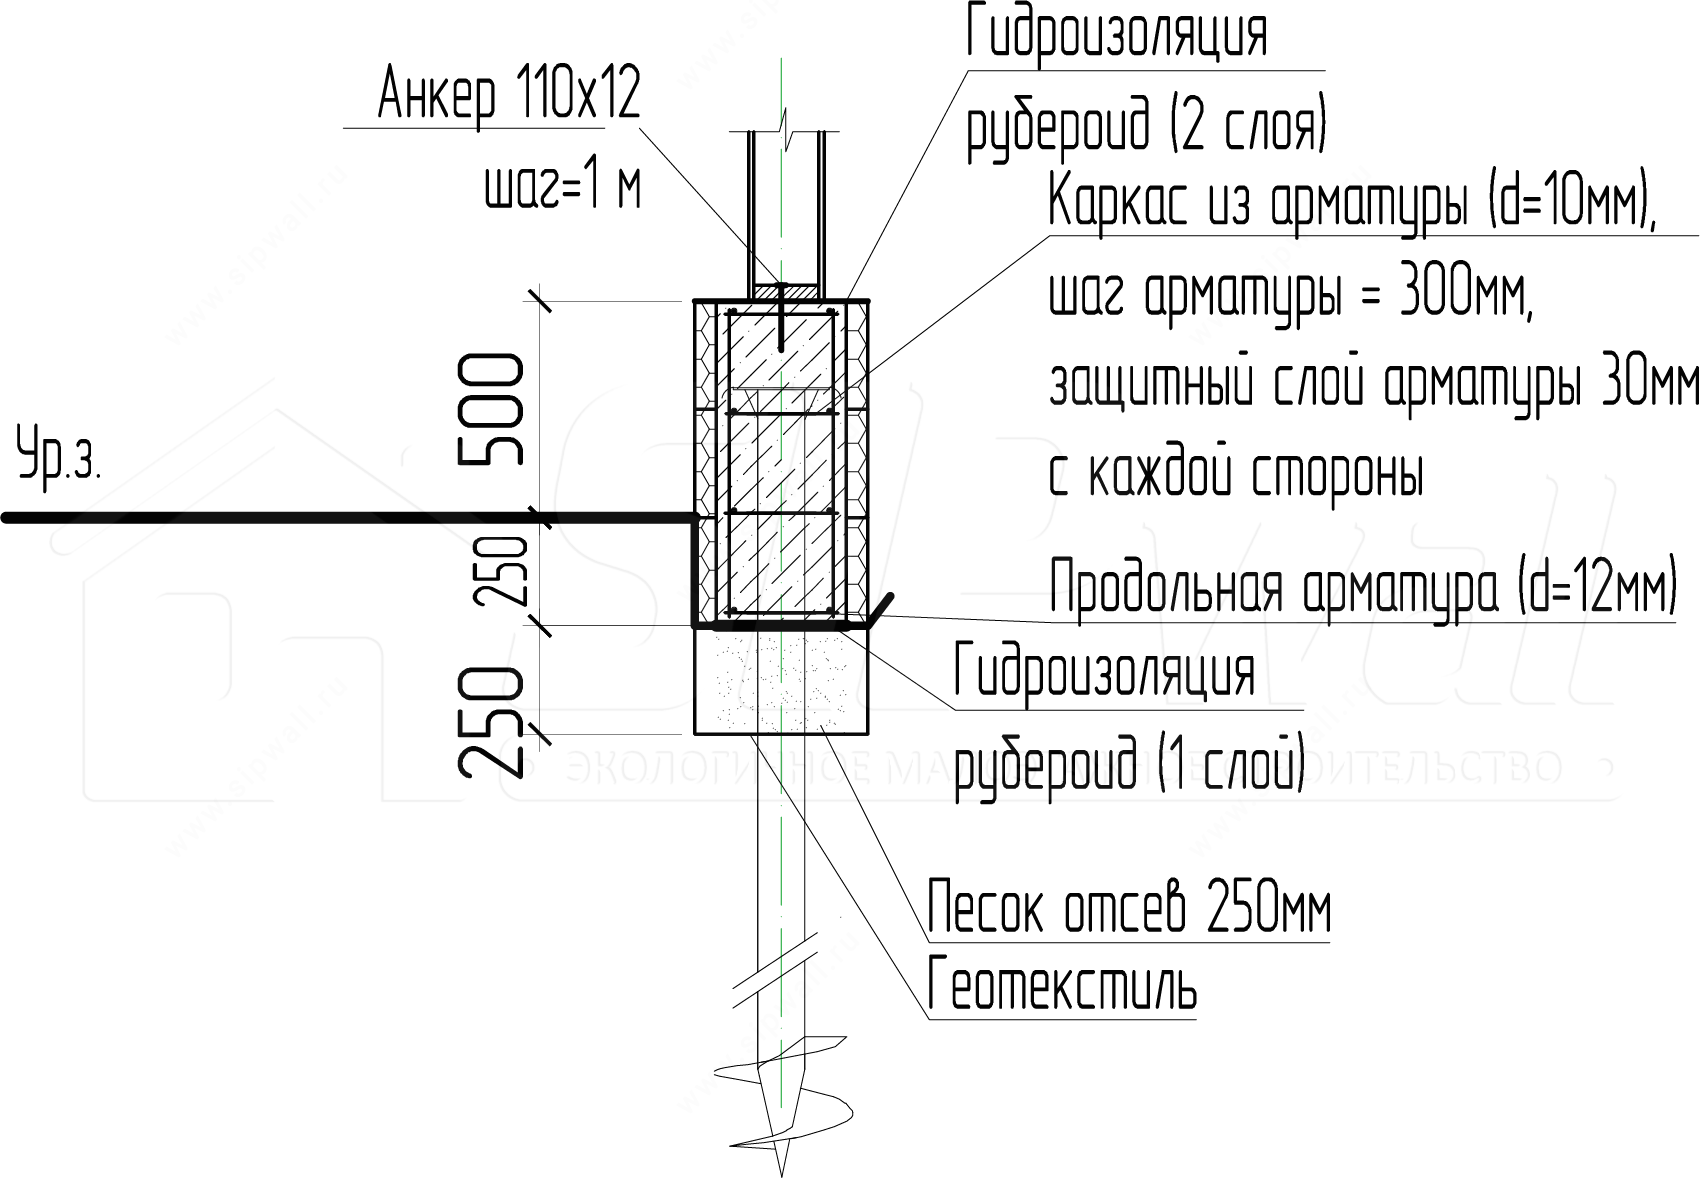
Main details of a grillage on screw piles with pile heads (piles d=108 mm, d=89 mm)
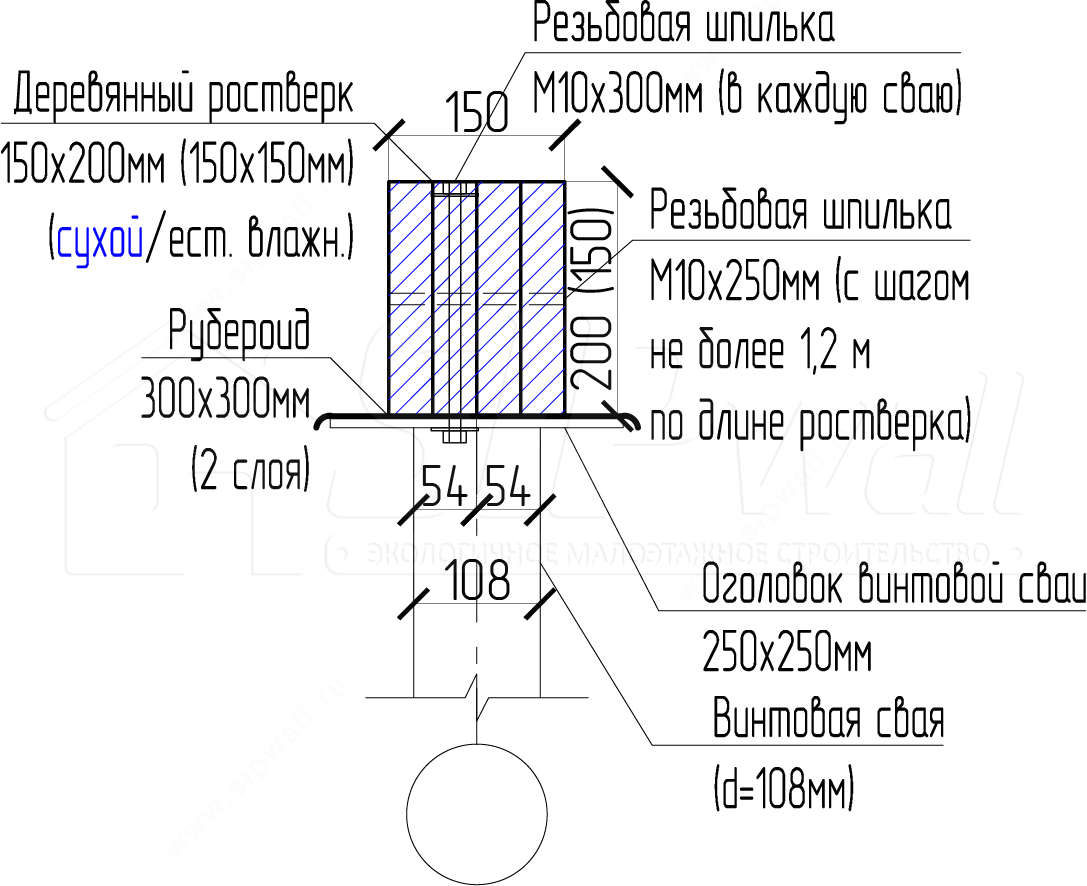
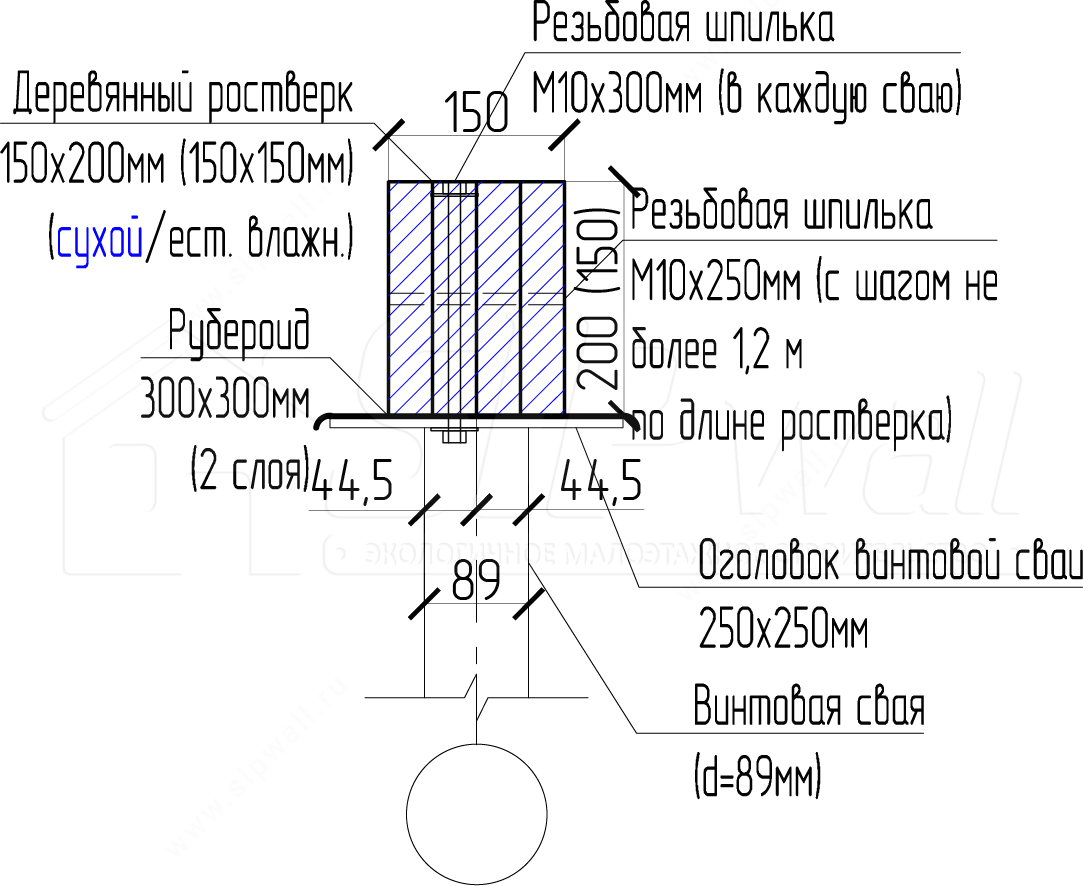
Main details of a grillage on screw piles using a channel (piles d=108 mm, d=89 mm)
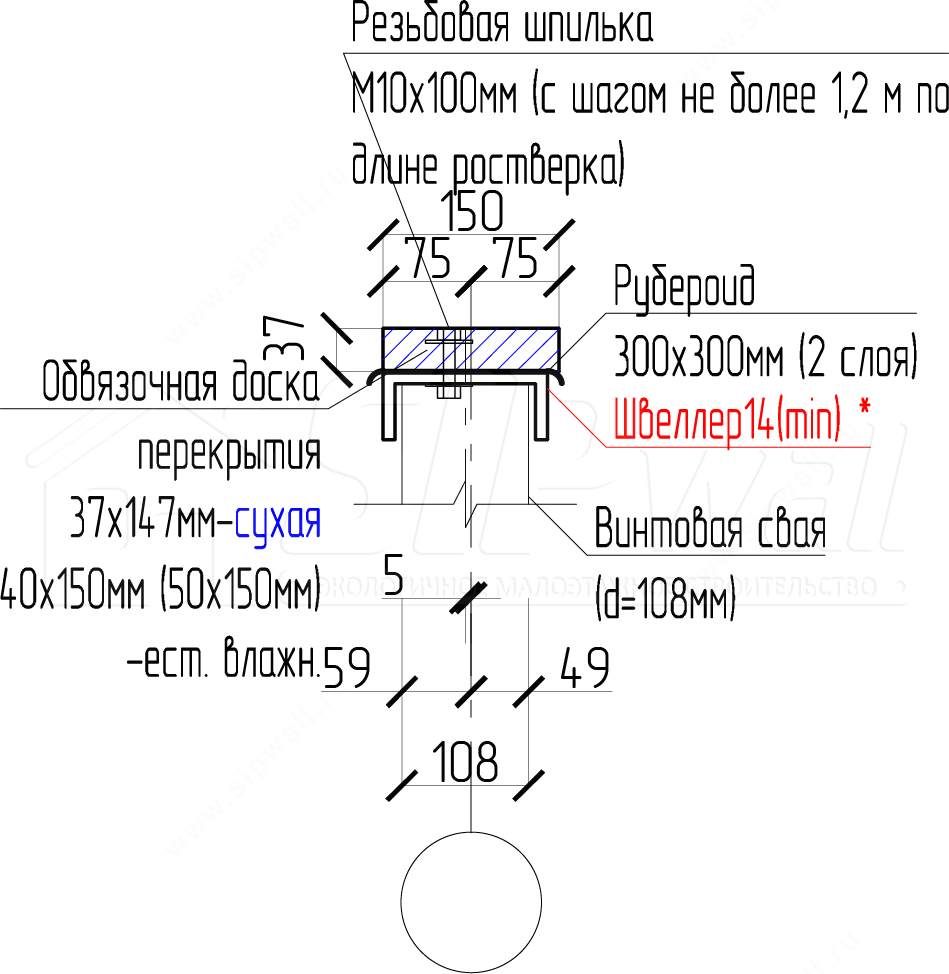
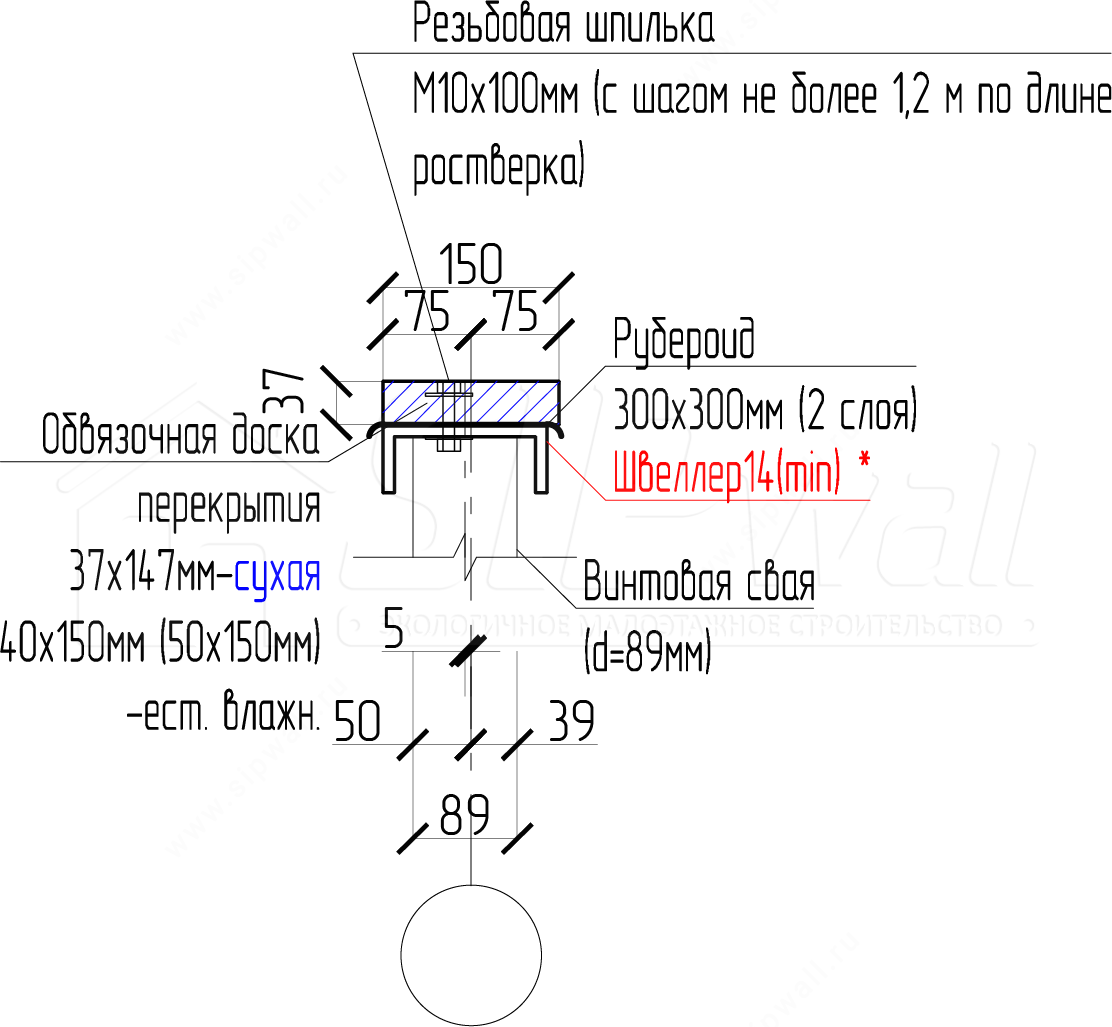
*The channel is selected by calculation. The minimum dimensions of the channel used in this position are 140 mm (channel 14); the offset of the channel's and pile's center axis from the main axis is 5 mm.
Key points for fixing a timber grillage to screw piles:
- Fix the grillage members to each other with reinforced angle brackets KPW-4 (105 × 105 × 90 × 2,5 mm) and screws 3,5 × 41 mm (10 pcs. per bracket).
- Where a joint does not fall over a pile, fix the grillage with an open OBR-R timber support (150 × 150 × 76 × 2 mm) and screws 6 × 80 mm (10 pcs. per timber support).
- Threaded rod M10 for tying the grillage, 0,25 m – 1 pcs. (1 pcs. per 1,2 m of grillage).
- Threaded rod M10 for pile heads, 0,3 m / lag screw M10 – 1 pcs. (2 pcs. per ordinary joint, 2 pcs. per corner joint, 3 pcs. per T-joint, 4 pcs. per cross joint).
- Oversized washers and nuts (2 pcs. per length of rod).
- A grillage made of lumber at natural moisture content is built up from three boards of section 50 × 200 or 50 × 150, at a spacing of 250 mm with screws 4,2 × 90 mm, from both sides in a staggered pattern.
- A grillage made of dry lumber is built up from four boards of section 37 × 200 or 37 × 150, at a spacing of 250 mm with screws 4,2 × 64 mm, from both sides in a staggered pattern.
- When fixing the grillage, lag screws 10 × 120 mm may be used in places where a threaded rod is hard to apply.
Storing the House:
- During loading, transport, unloading and storage, the parts and products must be kept safe (protected from mechanical damage, moisture and dirt).
- The House may be stored outdoors for no more than 20 days from the date of shipment by the manufacturer. Materials must be stacked in accordance with the rules described in “Recommendations for assembling a house kit produced with SIPwall technology”.
- Under a specially equipped canopy that keeps out direct moisture and sunlight – no more than 30 days from the date of shipment by the manufacturer. Parts and products under the canopy must be laid out in stacks; products in horizontal stacks must be sorted by panel. Spacers (of dry lumber) at least 100 mm high must be laid under the bottom row or bottom pack. Timber inserts in the stacks must be separated by spacers of dry lumber so that each product and the stacks as a whole are ventilated. Outdoor storage at air humidity above 50% makes the timber swell, which makes it harder to join the panels, so assembly of the House's timber structures must be completed within one month of delivery.
- Storage for more than 30 days must be in closed, dry, ventilated rooms with air humidity of no more than 50%.
Main details of the support for a freestanding post
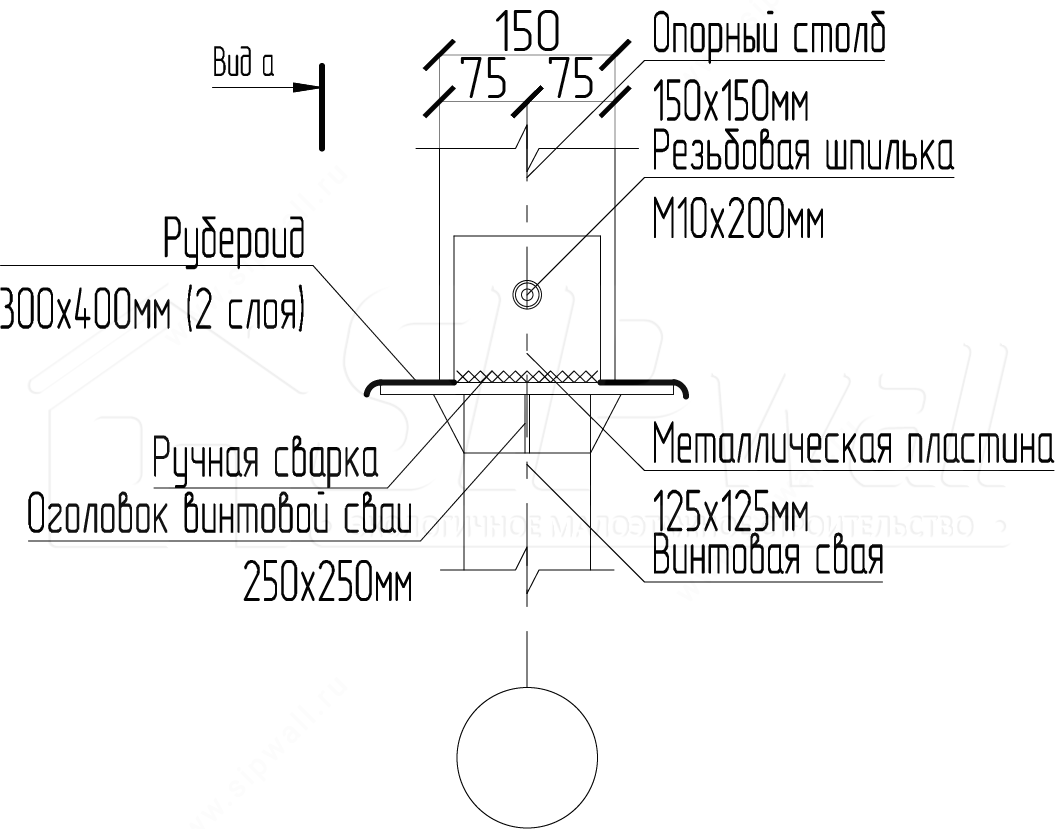
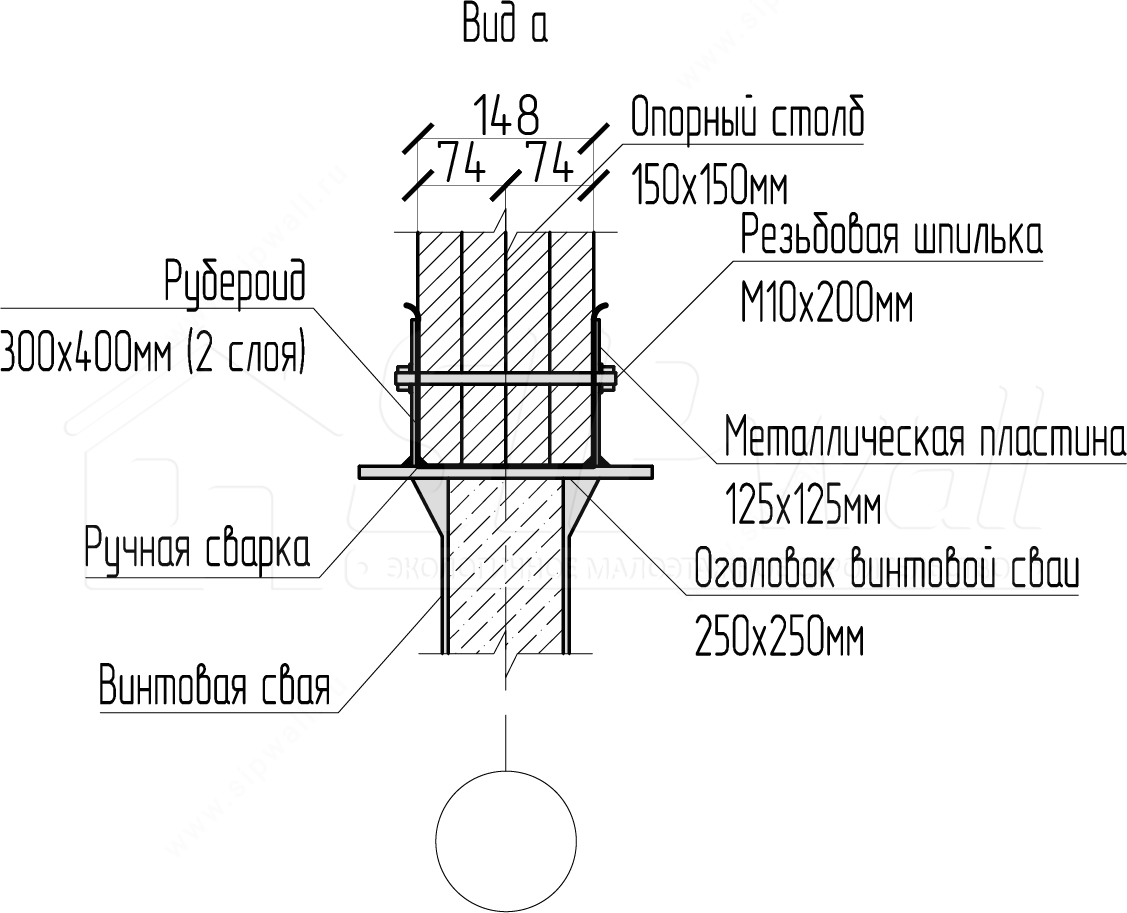
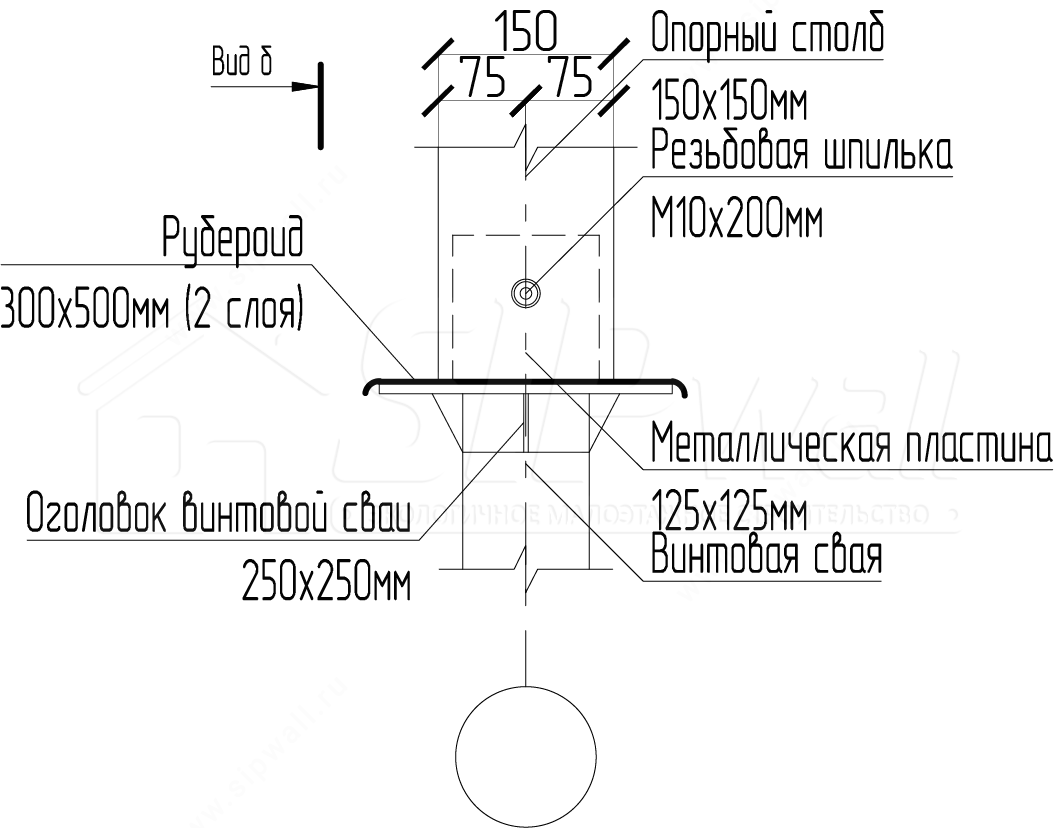
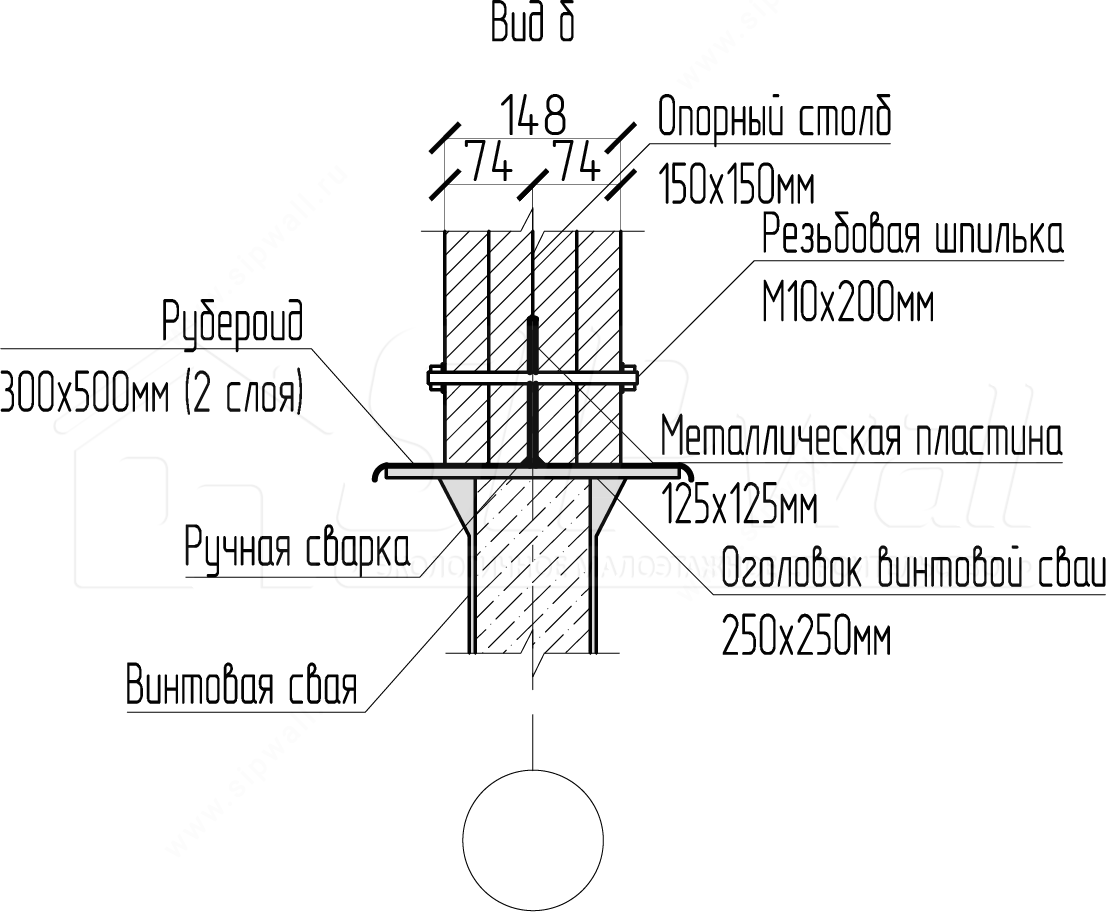
1. Before installing the support post, coat the surfaces that touch metal with bitumen mastic. 2. Lay 2 layers of roll waterproofing where the post rests on the screw pile head.
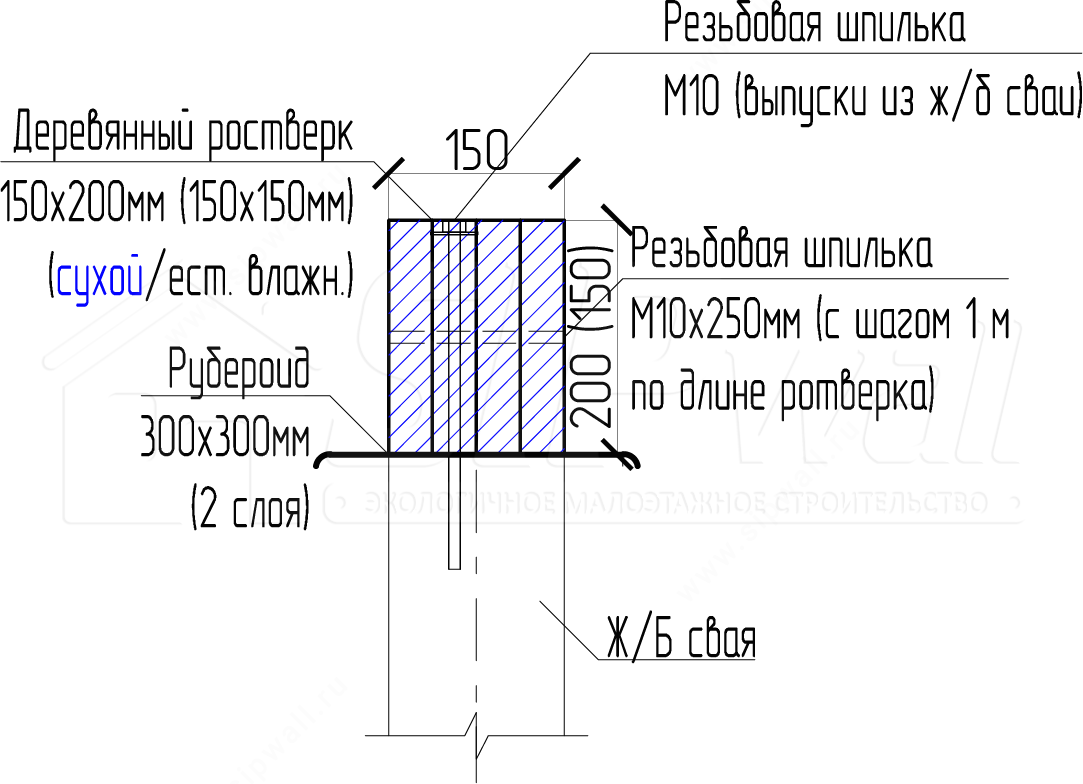
2. Reinforced concrete pile foundation
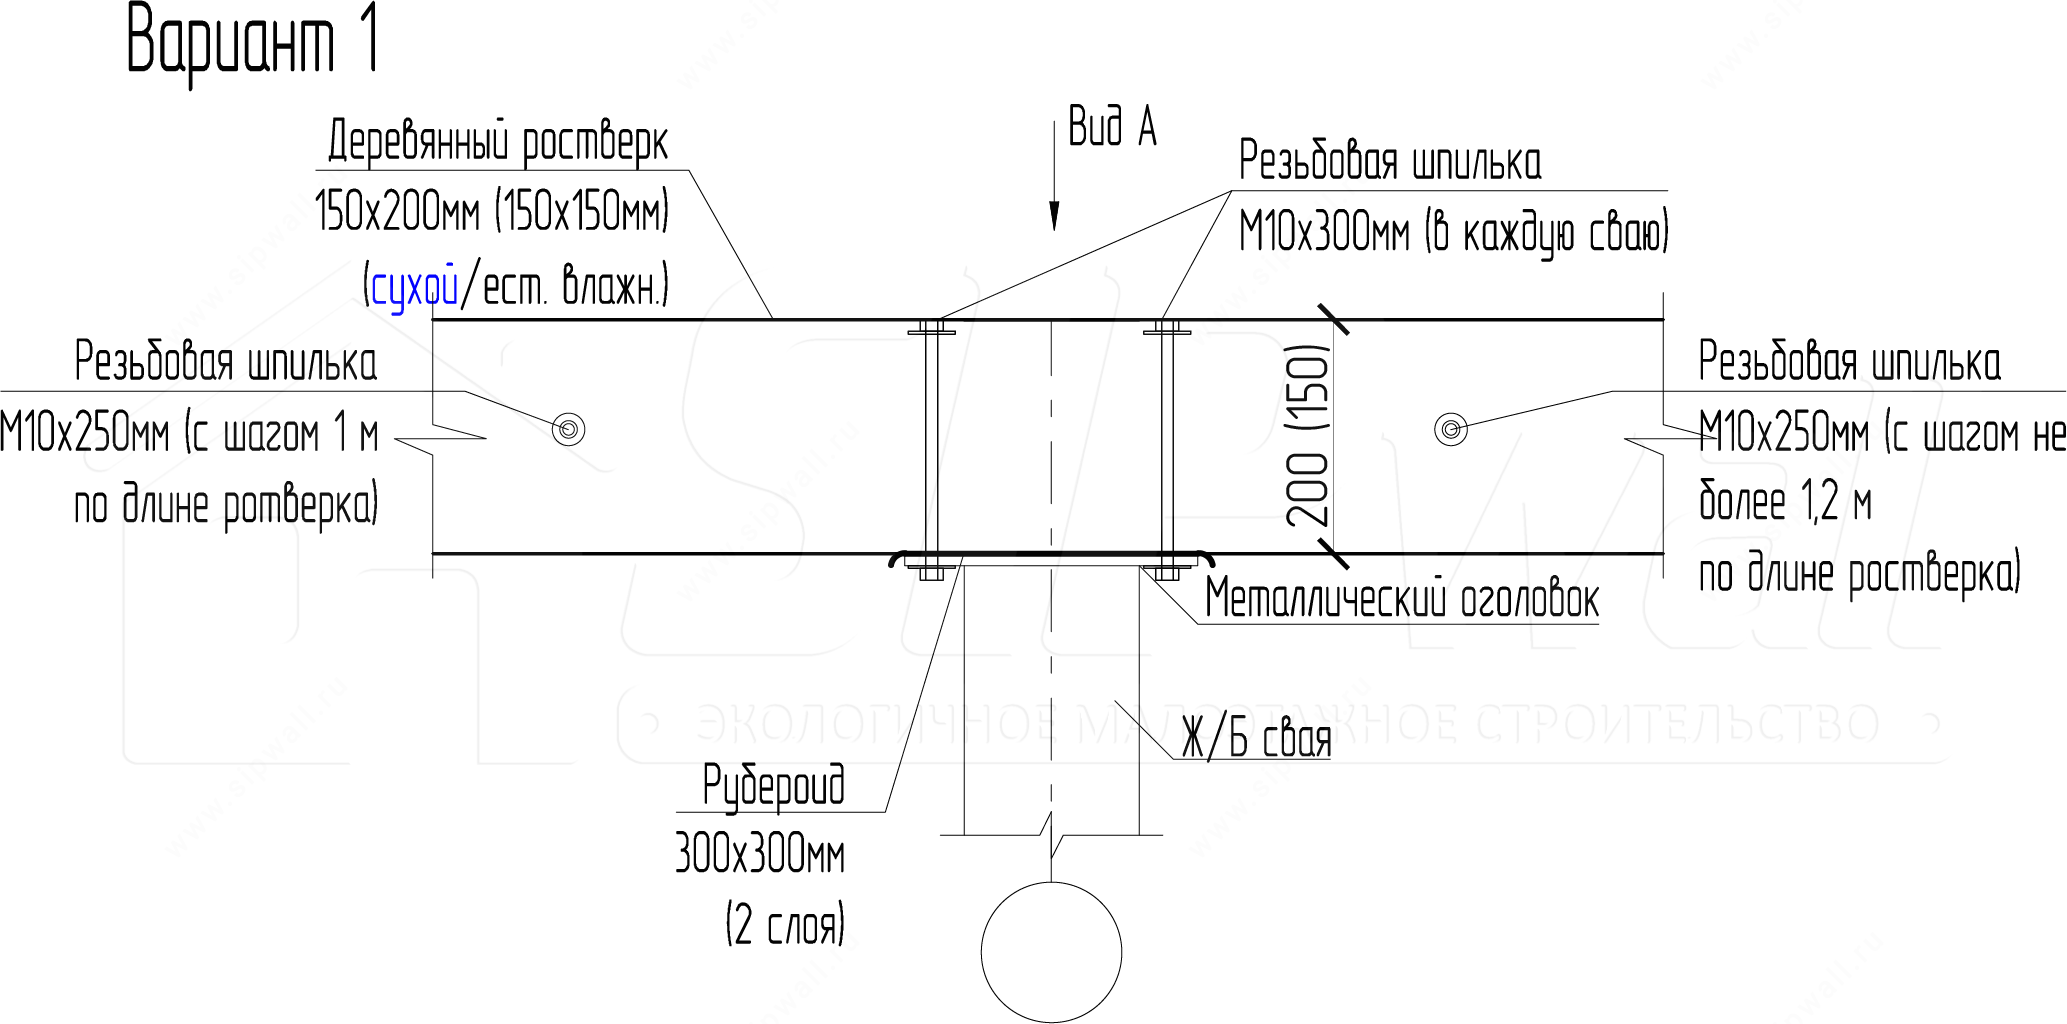
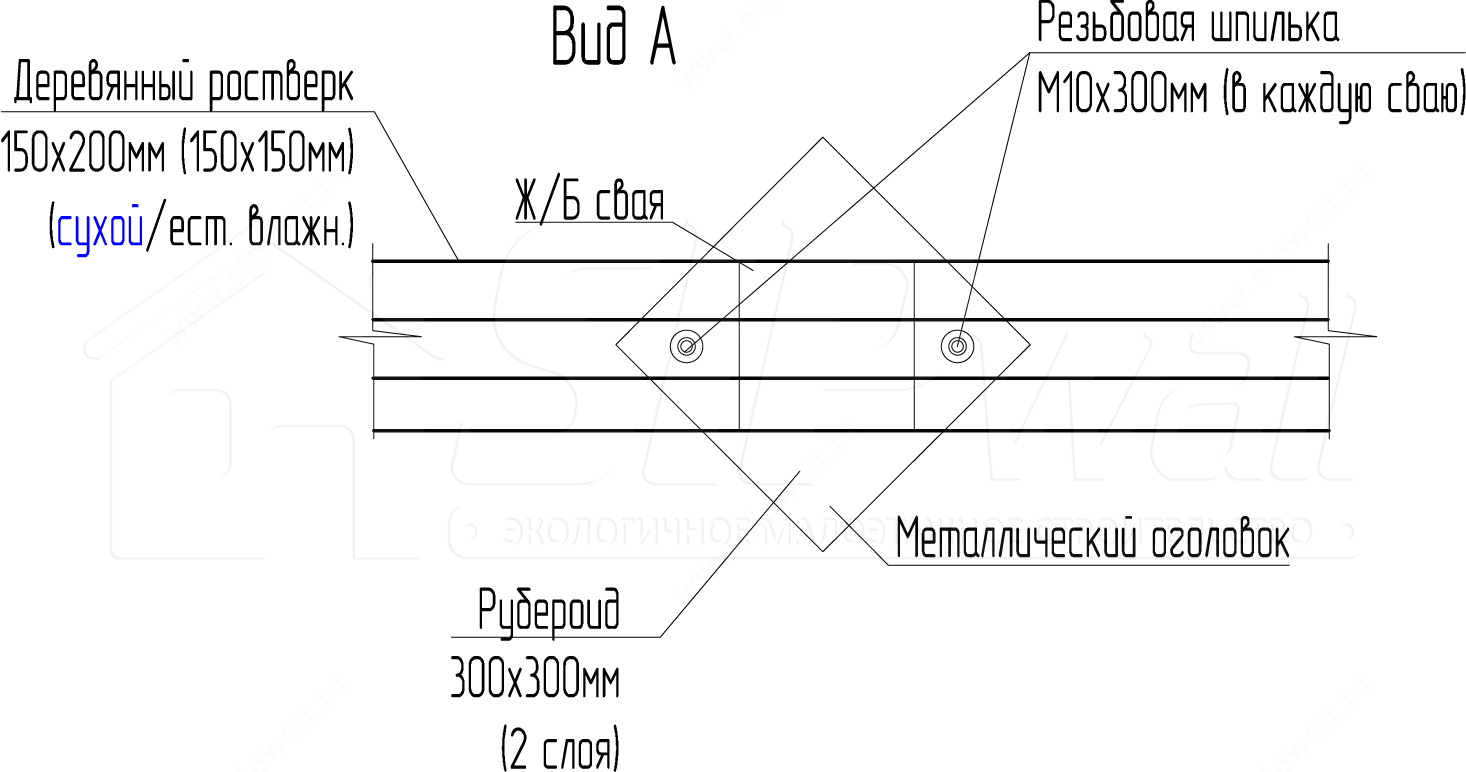
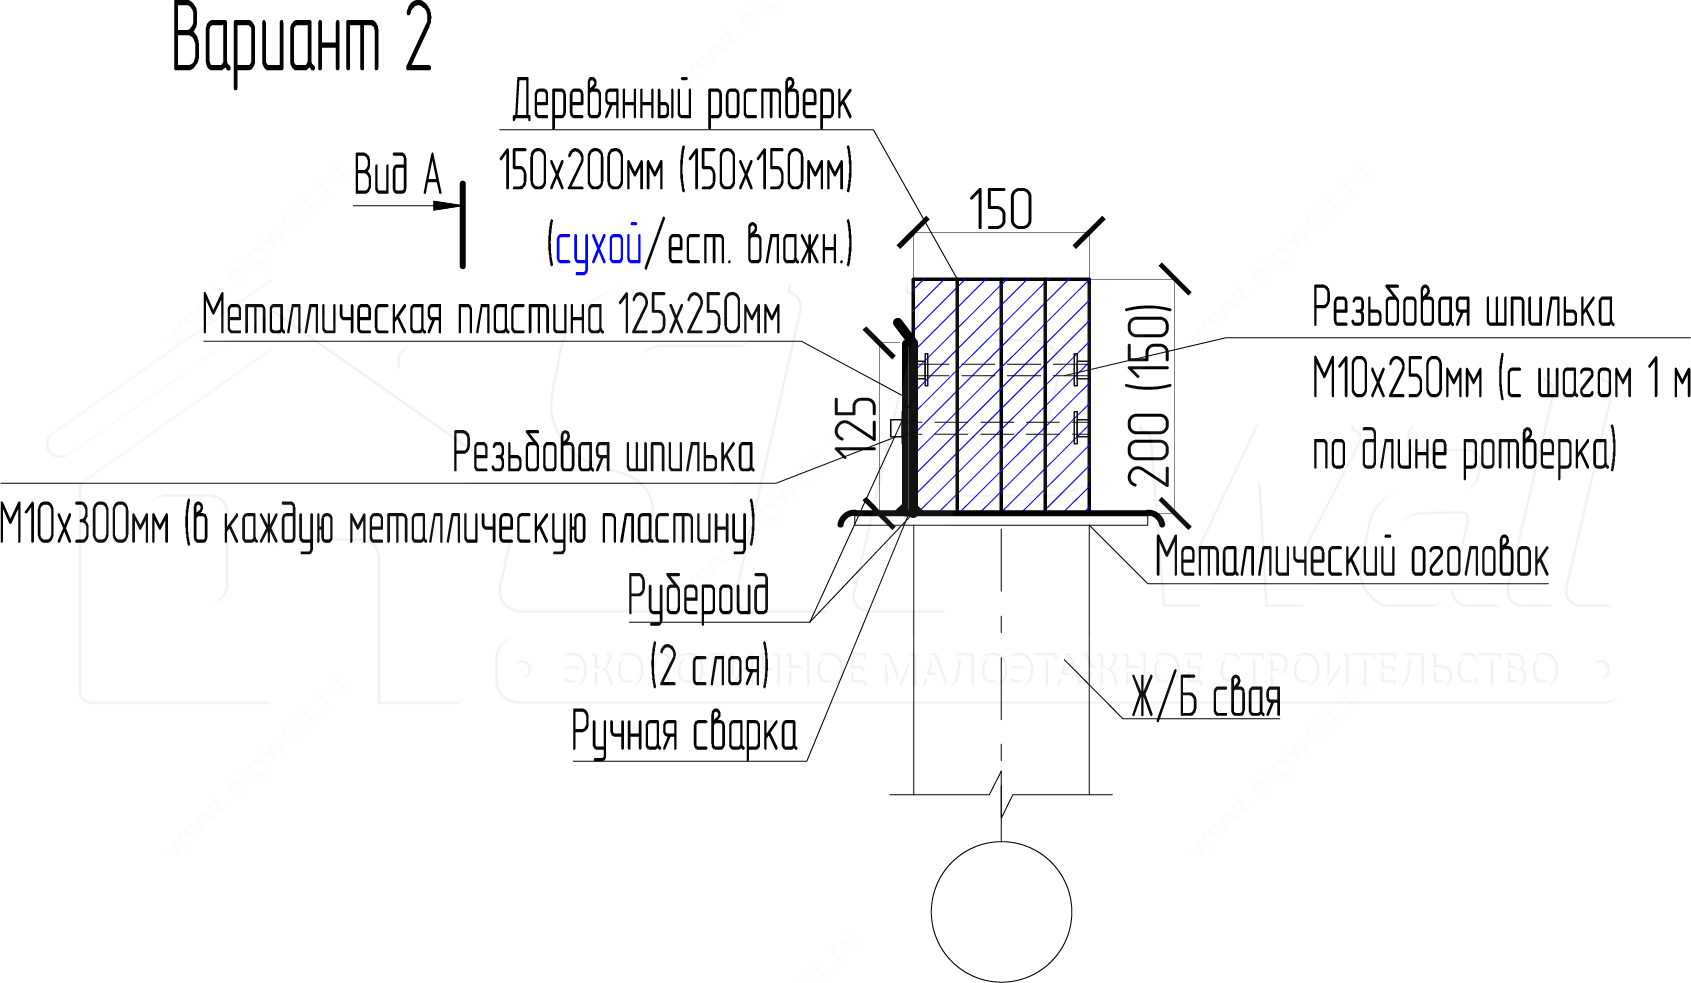
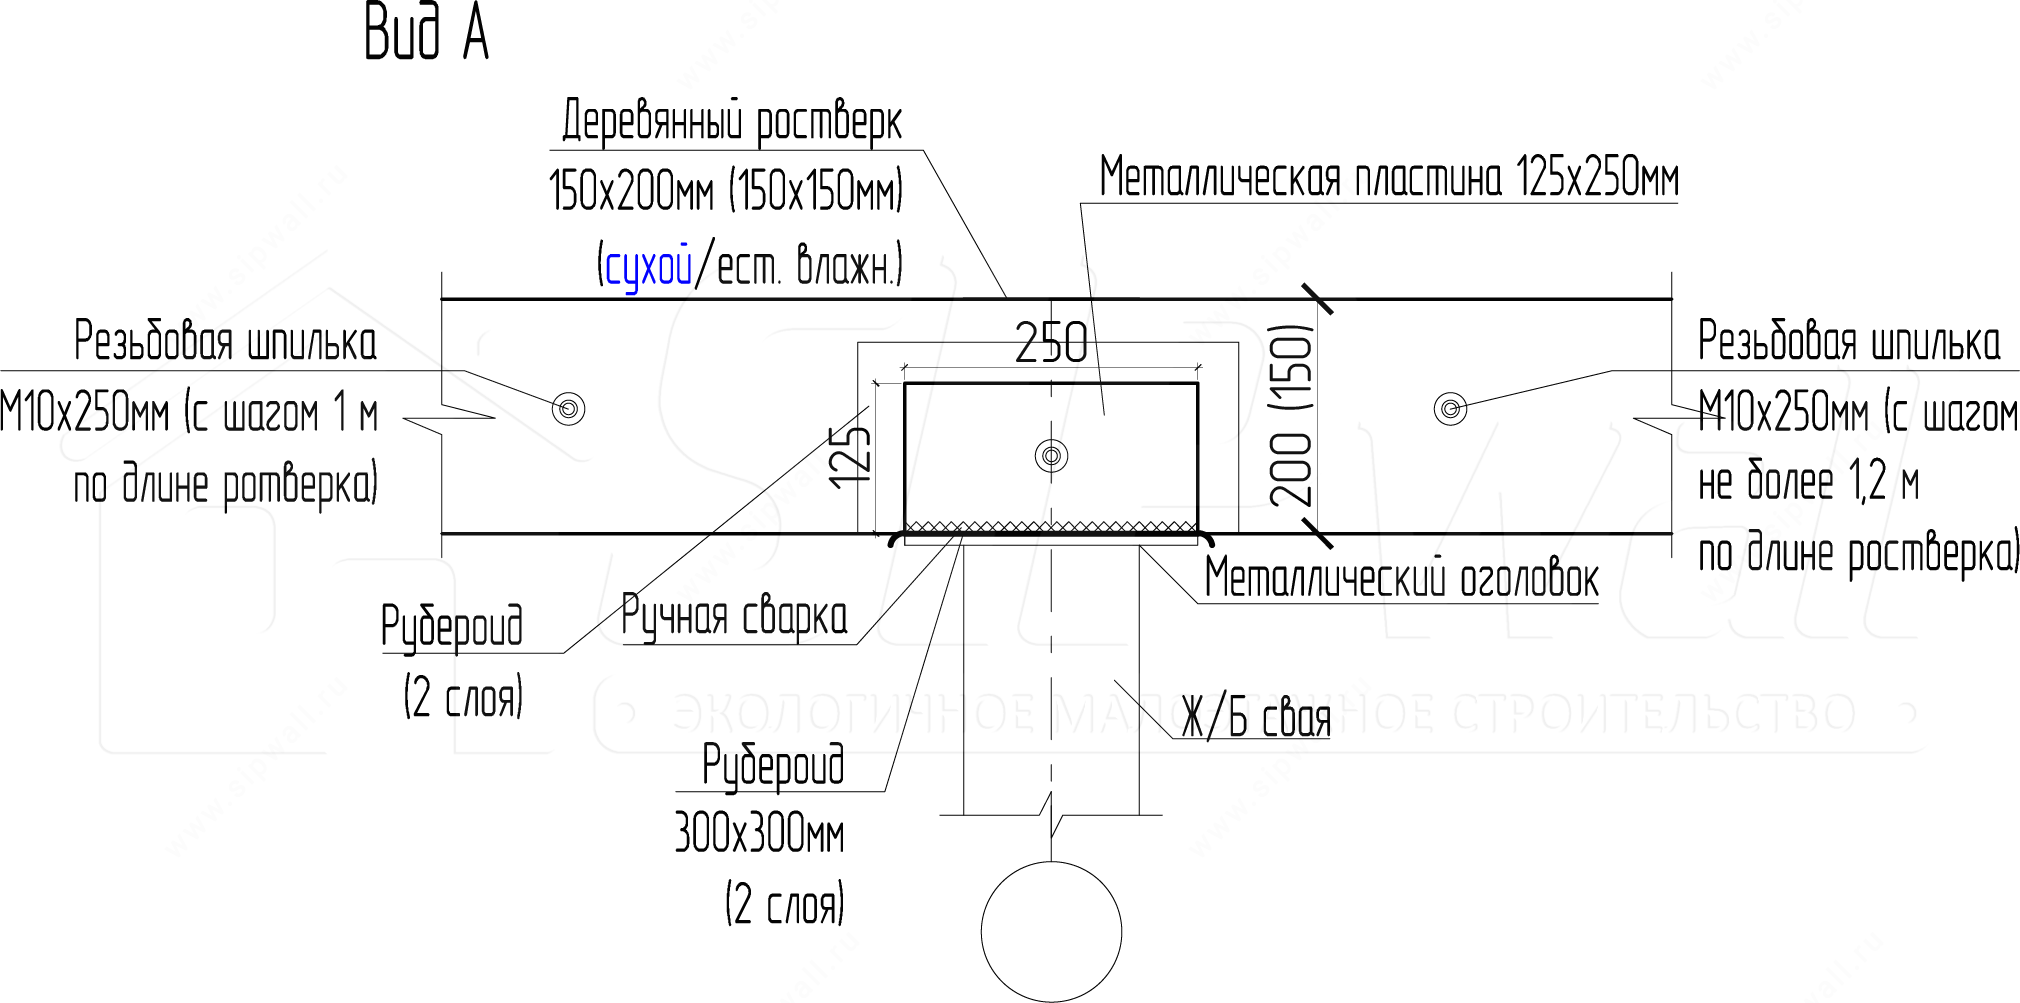
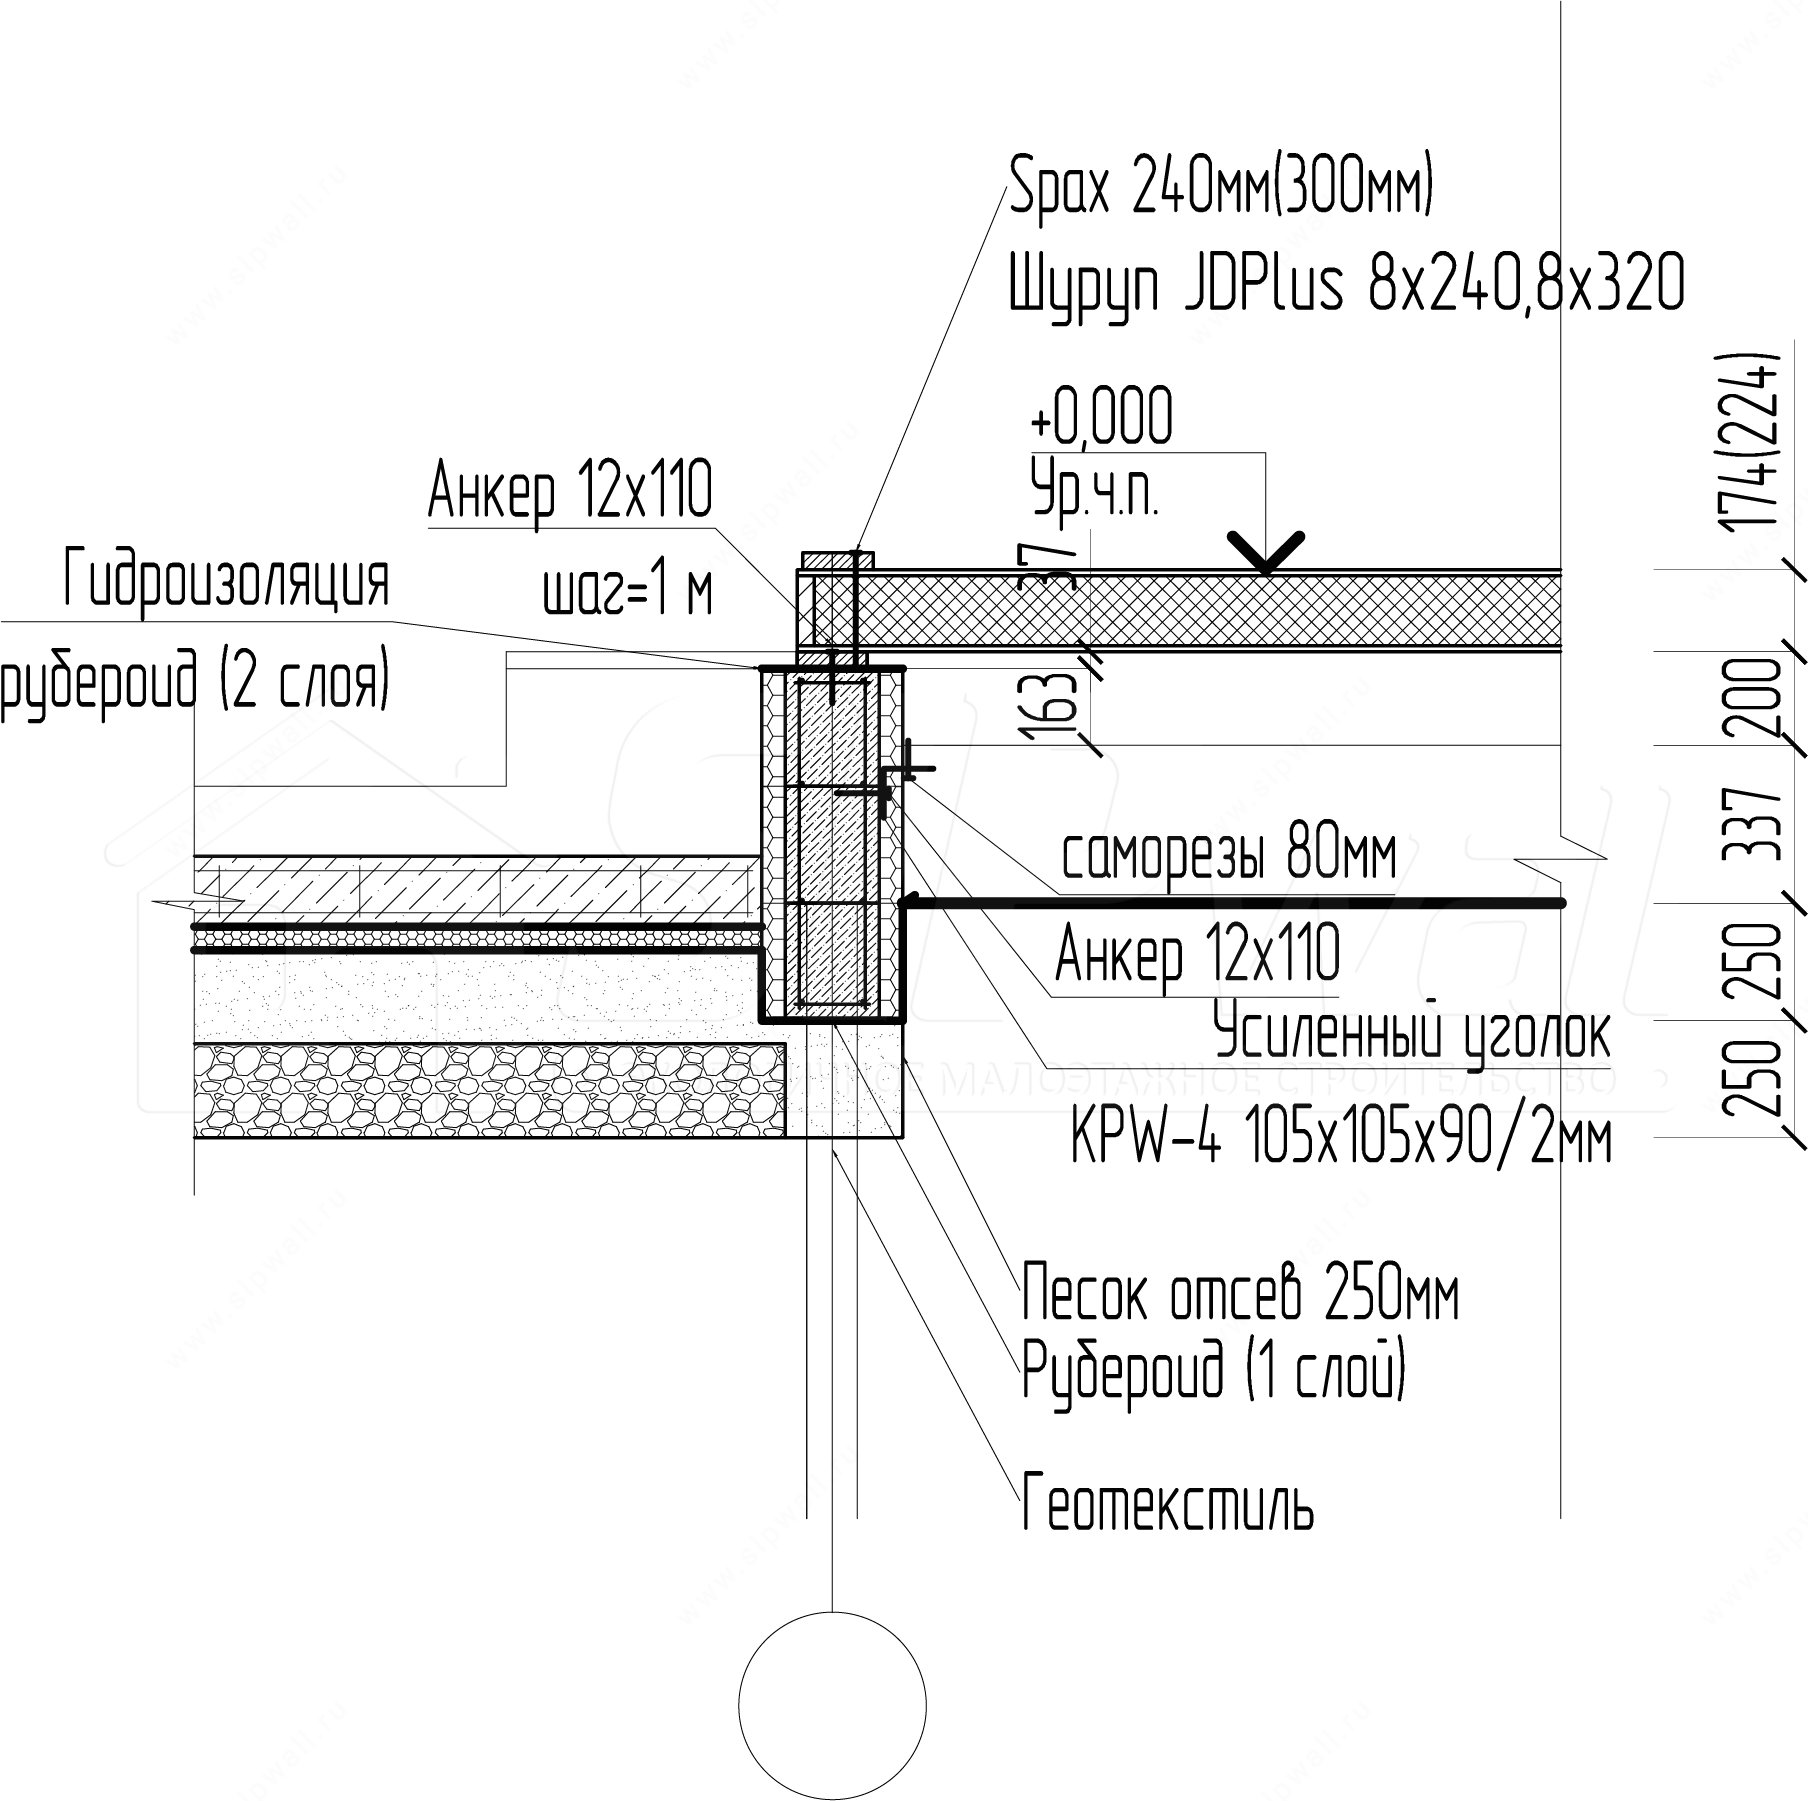
3. Reinforced concrete strip foundation with permanent formwork
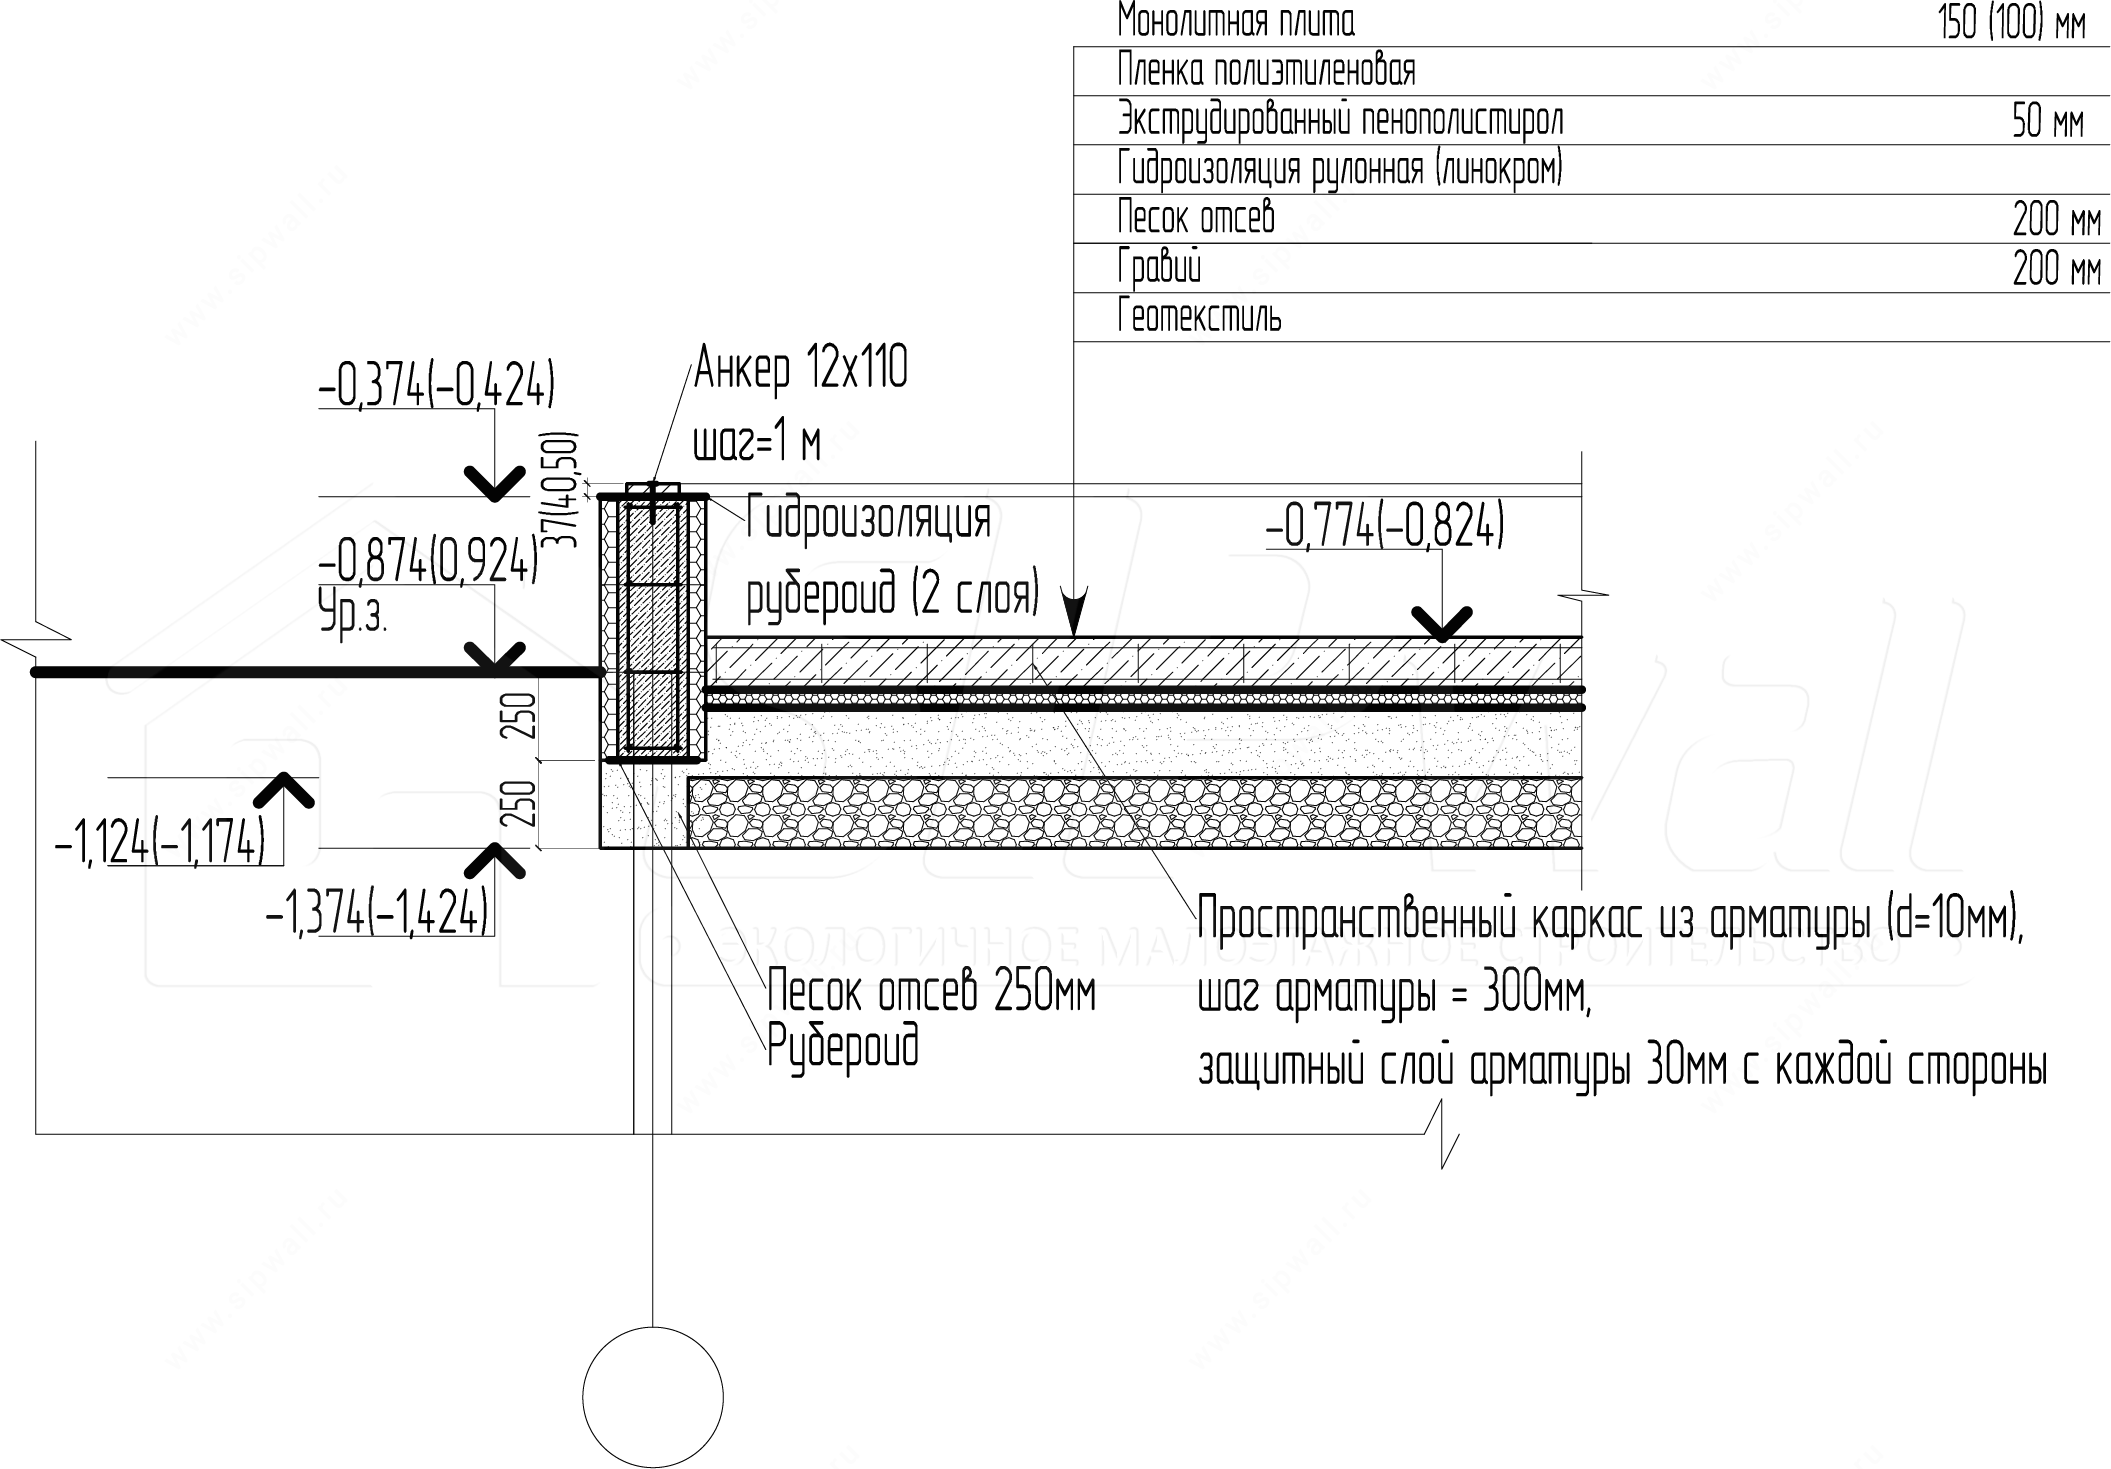
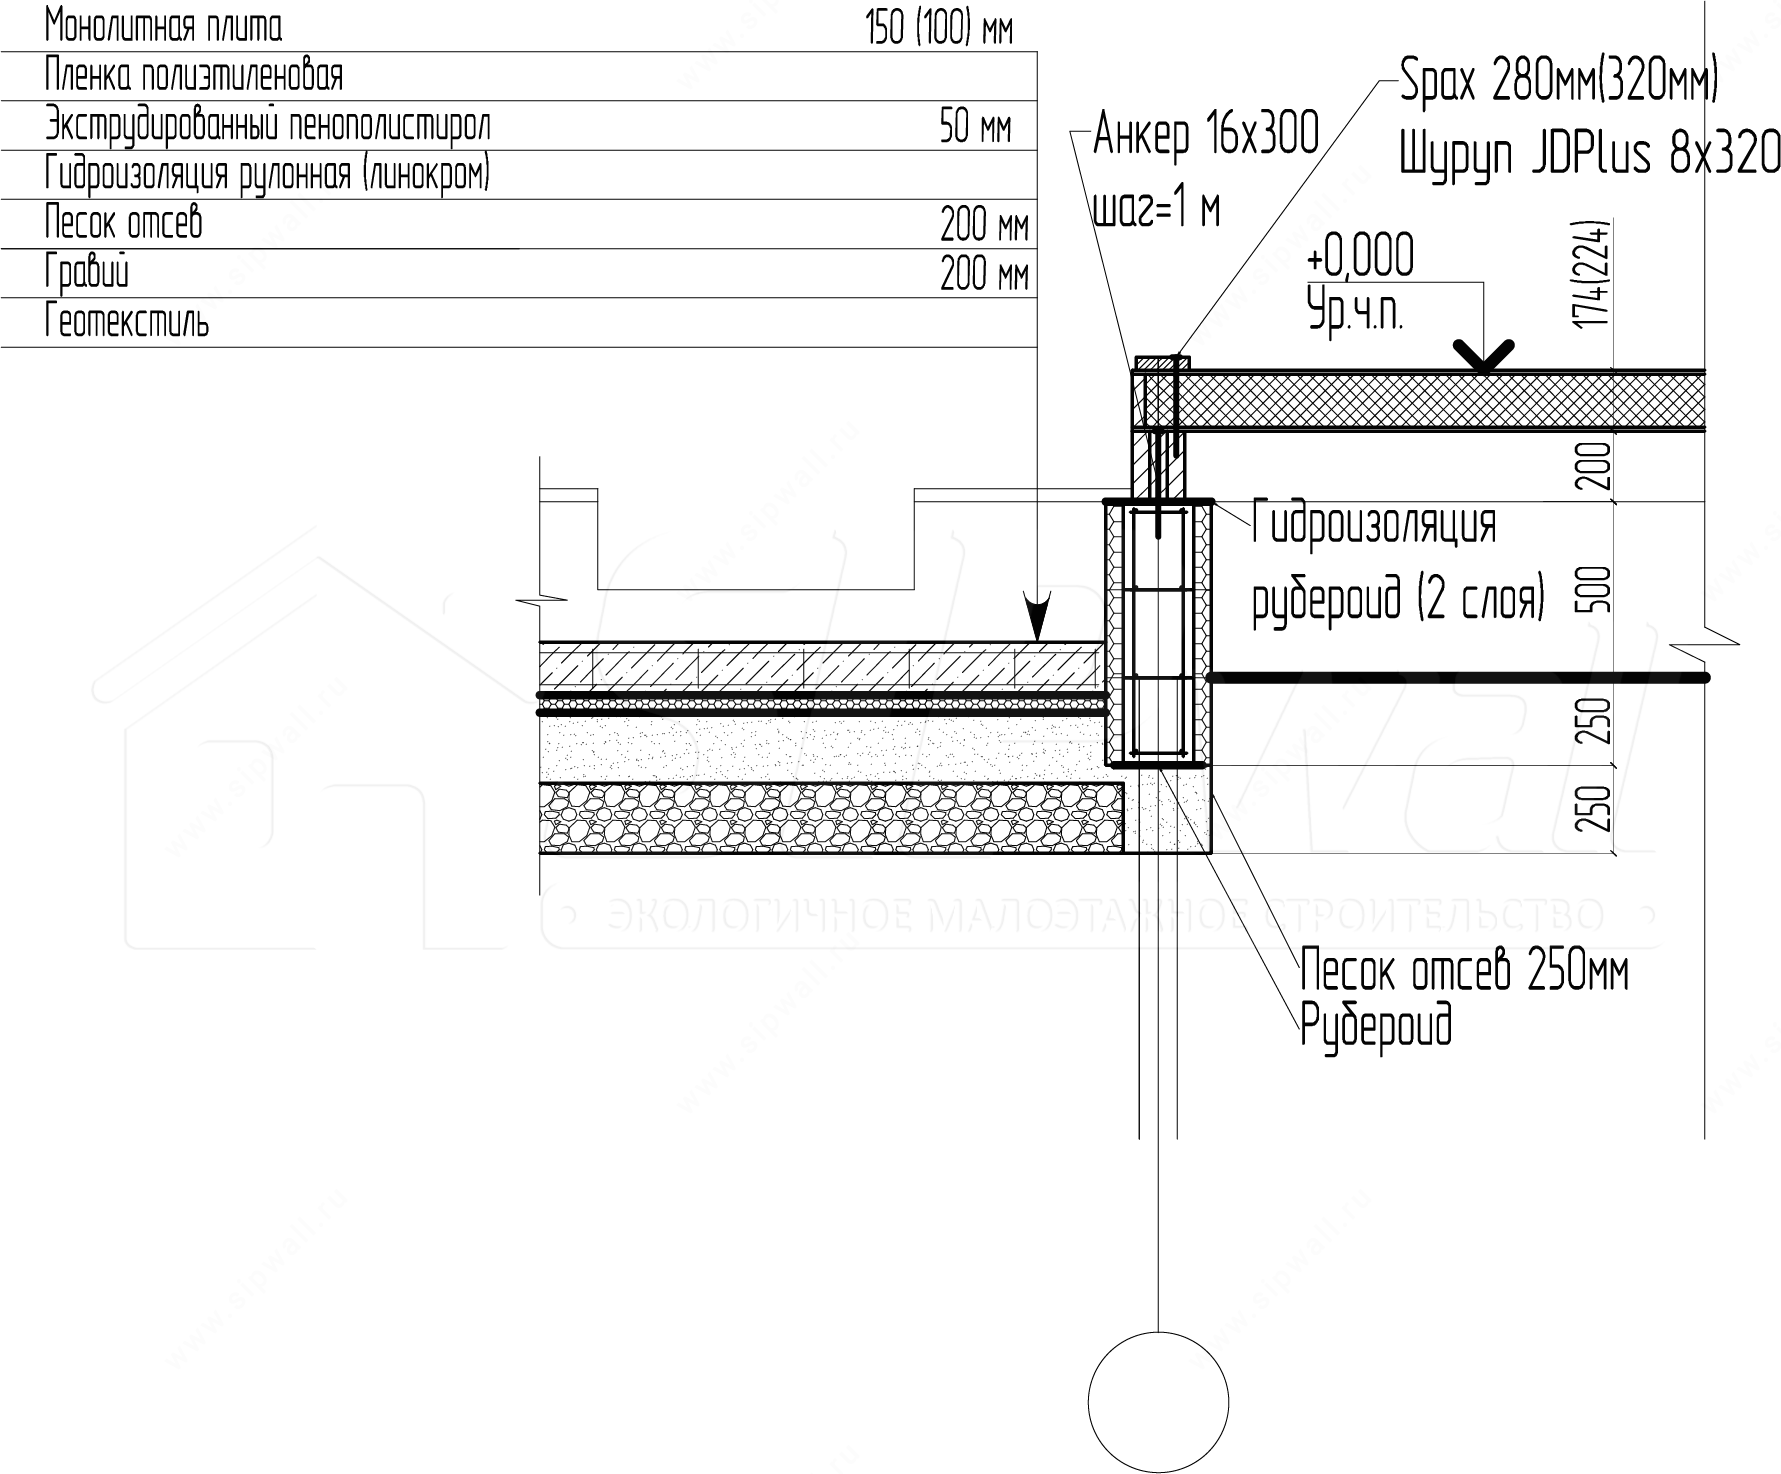
4. Combined foundation